How to Tap Trees for Maple Syrup
Making maple syrup is an excellent spring activity to get outside, enjoy your trees, and make something truly valuable! This picture guide walks you through the steps to make your own delicious maple syrup.
When you’re first starting out, a lot of the literature on making maple syrup can make it sound really difficult, but the truth is, it isn’t hard, and in fact, once you’ve seen how it is done, it’s easy to repeat it yourself and even modify the techniques in order to better suit your own syrup-making operation!
In this article, I will walk you through the procedure and equipment I use, and I think you’ll find that the process is pretty straight-forward. I hope you find this article useful!
Overview
The following is a detailed overview of how to tap Maple Trees and collect the sap for Maple Syrup. For more FREE information on making Maple Syrup, visit the Basics section of this website, where we go through all of the basic steps for making maple syrup!
What I Use:
Occasionally I have people asking me what equipment I use for harvesting and boiling maple syrup, so I put together this helpful list below. I describe each item and how it’s used. Also, a lot of the links below are affiliate links, which means I earn a little extra cash (at no extra cost to you!) if you purchase those items. Thanks in advance for your support!
- Cordless Drill
- 5/16″ bit
- Spiles (taps) and tubing, or Stainless-Steel Taps
- Rubber mallet
- Food-Grade 5-gallon Buckets, or Empty Milk Jugs
- Propane Boiler
- Stainless Steel Boiling Pan
- Or Maple Syrup Evaporator with Dual-Propane Boiler
- Refractometer
History of Maple Syrup
The indigenous people of northeastern North America were the first to make Maple Syrup and Maple Sugar. They were producing Maple Syrup long before any Europeans arrived in region.
Though we may never know exactly how Maple Syrup production first came to be, one legend involves a Native American woman collecting the watery sap from a Maple tree for cooking a stew, rather than making the long trek to the nearest water source. Upon boiling the liquid, it became sweet (Wikipedia), and from that time on became a staple of the diet.
How to Tap Maple Trees for Sap
The first step in tapping trees for maple syrup is to identify that you have access to the correct type of trees to tap.
Click here to download a 1-page PDF "Maple Syrup Making Cheat Sheet" that contains a summarized version of all the steps to making delicious Maple Syrup!

Sugar Content of Different Types of Maple Trees
The good news is that any tree in the maple family can be tapped for syrup, the sap they produce just tends to have different concentrations of sugar ranging usually from about 1-5%.
The higher the sugar concentration in the sap, the less time will be required to boil the sap down into syrup.
The following table lists the average sugar concentration from the sap of various types of maples trees based on a study that examined the maple trees located on the St. John’s University campus in Minnesota (reference).
Check out my handy Maple Syrup Calculator that will tell you how much Maple Syrup you will end up with based on how many gallons of sap you start with and the sugar content of your sap!
It also gives the ratio of gallons of sap that you need to boil down to get one gallon of syrup.
| Type of Maple Tree | Sugar Conc. of Sap (%) | Ratio Sap/Syrup |
|---|---|---|
| Sugar Maple | 4.5 | 19:1 |
| Red Maple | 4.1 | 21:1 |
| Amur Maple | 3.9 | 22:1 |
| Silver Maple | 3.4 | 26:1 |
| Box Elder | 2.5 | 35:1 |
Another study out of Vermont included 4500 maple trees measured over the course of 12 years and found some interesting results:
- The sugar concentration of sap produced by any given tree generally varies from year to year by about 1%.
- Over the course of one season, the sugar content of the sap from a single tree varies by about 1%, usually starting the season higher and ending lower, though there is some evidence that suggests there is a peak in sugar content at about 1/3 of the way through the season.
- There can be great variety even in maple trees of the same type and located in the same bush, which can vary from each other in sugar content by as much as 2-3%.
- Regardless of the year, “sweet trees’ tend to always have higher sugar concentrations than trees that generally produce lower sugar content. In other words, if you find a good tree, it will always be good! And if you find a dud, it will always be a dud!
How to Identify Maple Trees
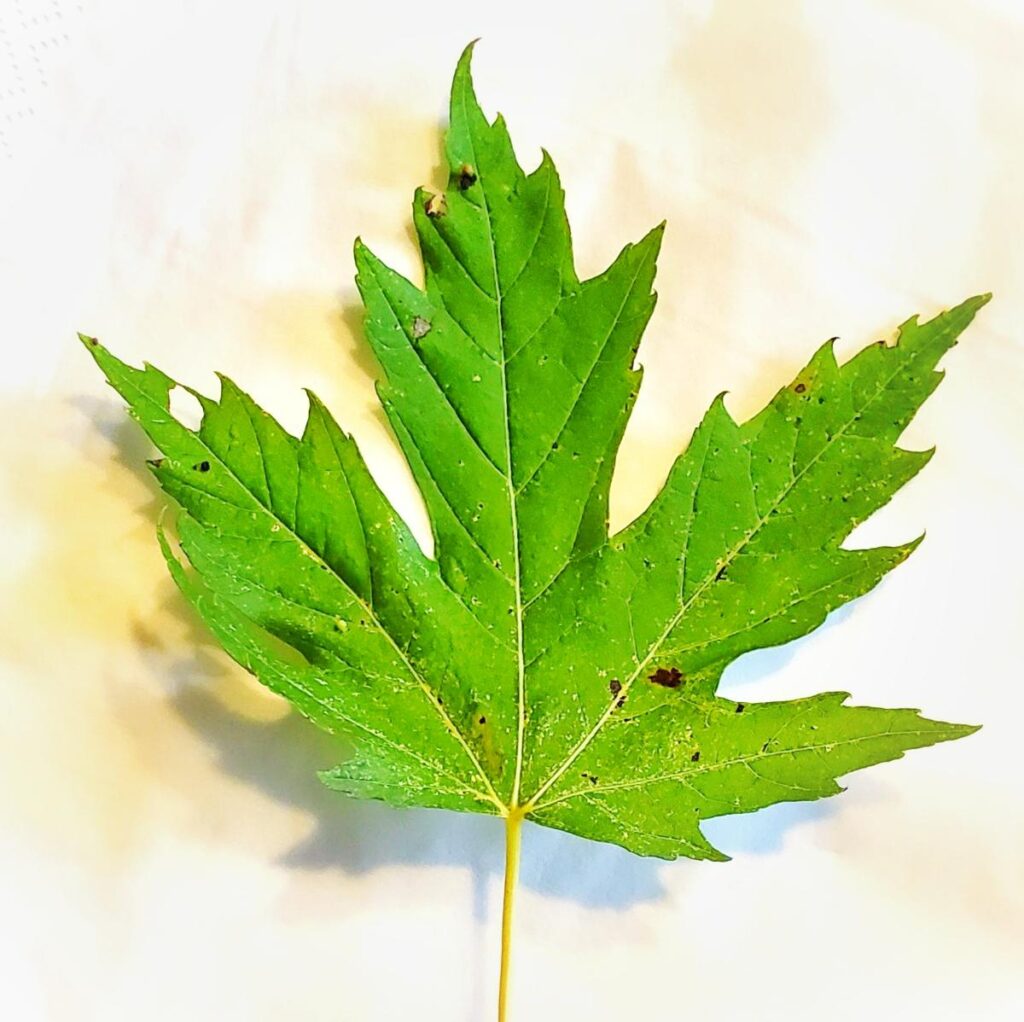
The most common type of tree to tap is of course the sugar maple, but over the years my family has also tapped silver maples, red maples, and even box-elder (sometimes called black maple) trees.
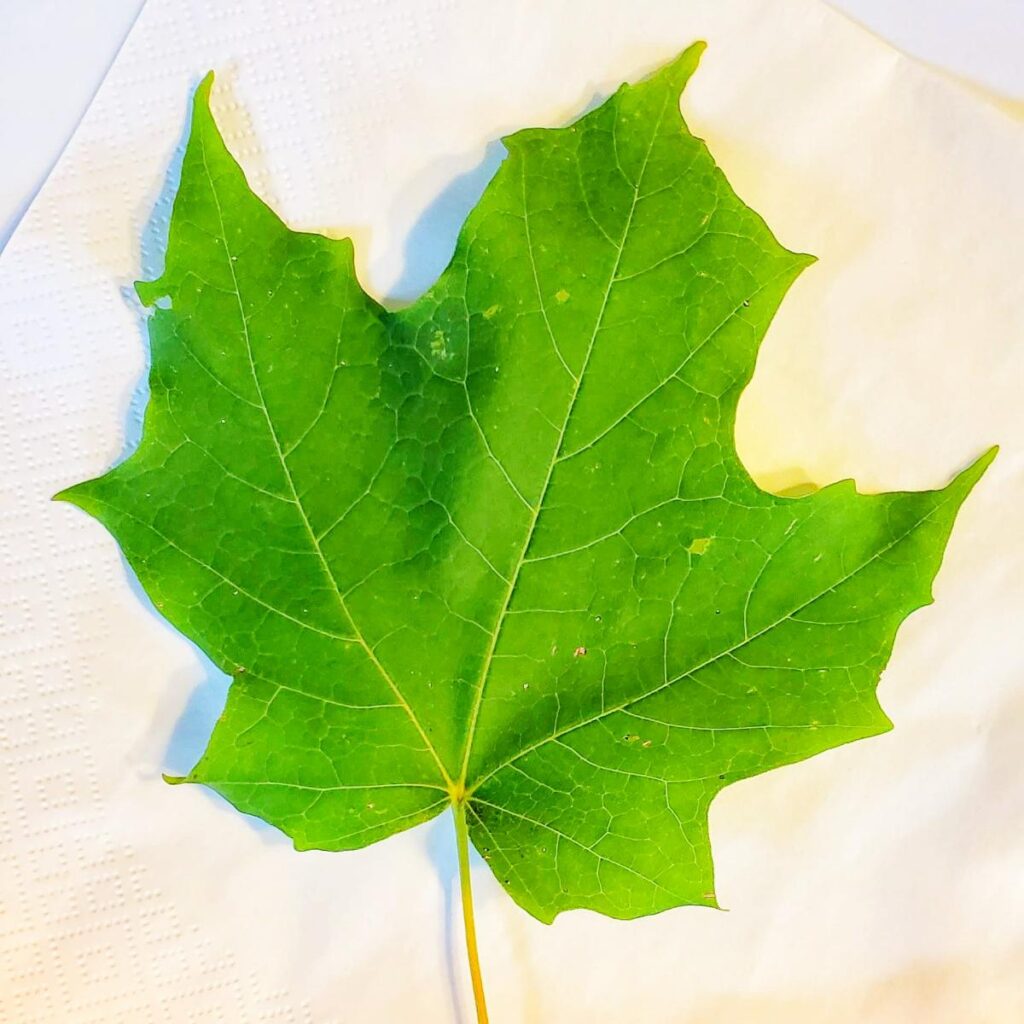

But Sugar Maples will give you, hands-down, the best tasting syrup, so shoot for those if it all possible.
If you don’t already know which trees are your sugar maple trees when spring comes, it can be tough because the leaves are gone!
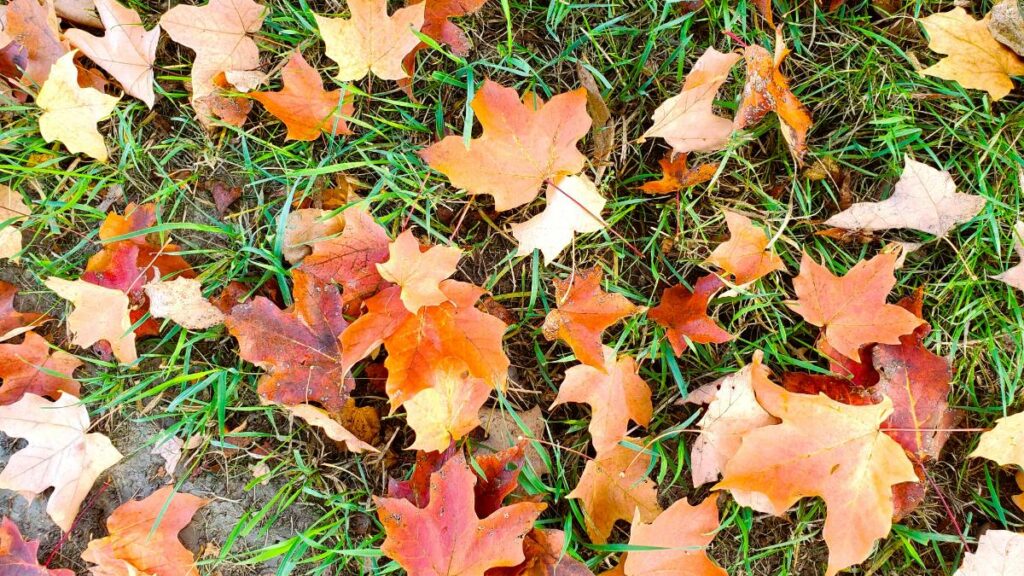
Try to find some leaves from last fall to help you identify them, otherwise, you can identify sugar maple trees by their rough distinctive bark.

Your trees should be a minimum of 10″ in diameter (at eye level) before tapping them. If you tap trees smaller than that, you risk injuring or even killing the tree. Larger trees can handle more than one tap.
In general, you can add a tap for every 5″ in diameter above 10″. For example, a tree more than 15″ in diameter can handle 2 taps, and 20″ can handle 3 taps, etc….
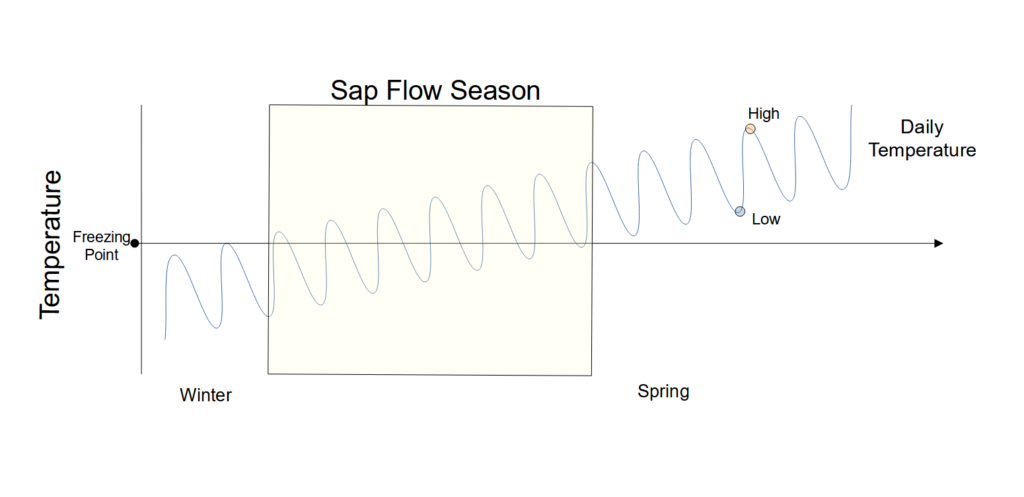
When to Tap Maple Trees for Sap
You tap maple trees in the spring when the temperatures are getting warmer. You want the temperature to alternate above freezing in the day, and below freezing at night.
In fact, the sap runs best when you have temperatures below freezing at night, and in the 40’s during the day.
Another way to know when your trees are ready, is that they will tell you! If you see any of your maple trees starting to ‘leak’ sap, that means they are ready to tap. What do I mean by ‘leak’? This is when you start to see the tree weeping water (sap) from some of the upper branches or crotches in the tree. This is usually indicated by a wet spot on the branch. It indicates that the sap is running.
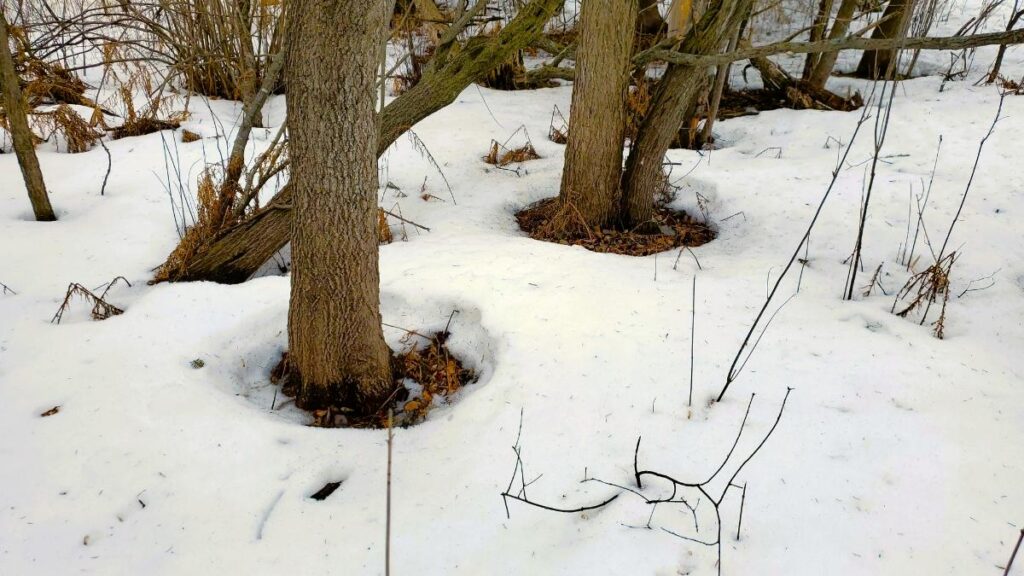
I would be remiss if I didn’t mention one other old-timers’ method for determining when the maple tree is ready to be tapped, and that is when you see “snow wells” around the trunk of the tree. The inuit word is qamaniq:
Qamaniq: “Bowl-shaped Hollow Around the Base of a Tree”
Snow wells are a depression in the snow around the base of the tree that indicate that the tree and its roots are being warmed sufficiently by the sun to heat up and melt the snow around its base.

Because of these temperature requirements, the maple tapping season usually occurs in March for most locations but can run anytime from February to April depending on the year.
Once the temperature stays above freezing at night or buds appear on the trees, the tapping season is over. Usually, the amount of sap you get starts to decrease, and the sap itself begins to taste bitter.
How Long is the Maple Sap Season for Tapping Maple Trees?
The season for tapping maple trees typically lasts about 4 weeks, with longer or shorter seasons ranging anywhere from about 3 to 5 weeks depending on the weather conditions.
How to Set the Taps in a Maple Tree
In order to set your taps, I recommend using the 5/16″ taps. In the past, 7/16″ taps were common.
The nice thing about using small diameter spiles is that the tree can fully heal up in 1 year, rather than several years as it can take with larger diameter holes drilled into them, and the amount of sap you get is the same.
Below is a comparison of a fresh hole (top), and one that is one year old (bottom), where you can see the 1 yr old hole has been nicely healed over by the tree.


To set the taps, use a cordless drill with a 5/16″ bit on it.

Drilling the Holes in the Maple Trees
Drill a hole in the tree at a slight incline upward so that the sap will run down through the spile.
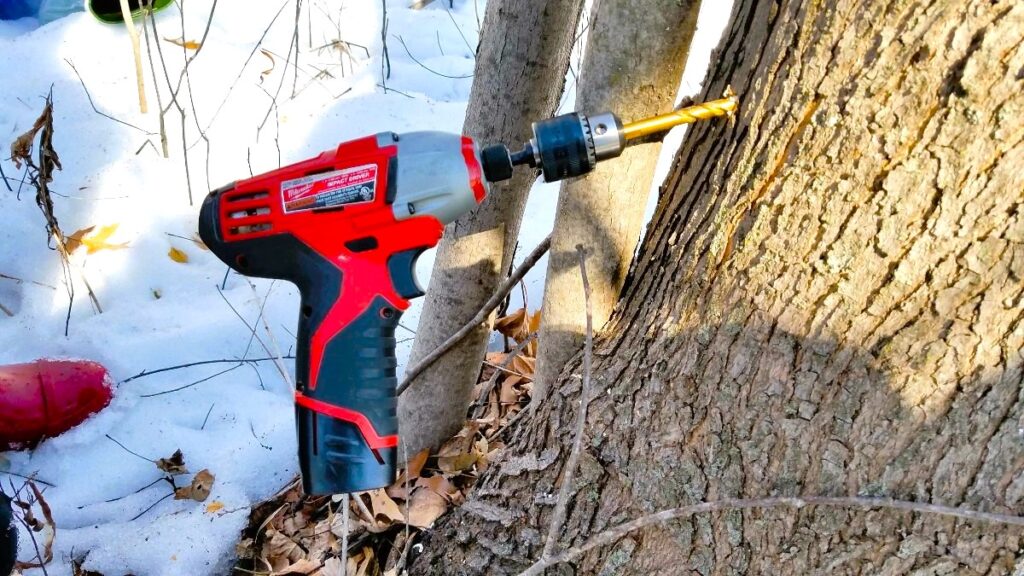
The distance from the ground is dictated by the length of tubing you are using. The length of the tubing I use is about 18 inches, so I drill holes at about 20″ – 24″ off the ground.
Drill the hole about 1.5" to 2.5" deep and no deeper.
Though, in general, the deeper you tap, the more sap you will get, but you also need to consider the health of the tree, so don’t go deeper than about 2.5″.

Use the drill bit to clean out the hole of any sawdust. Then align your spile.
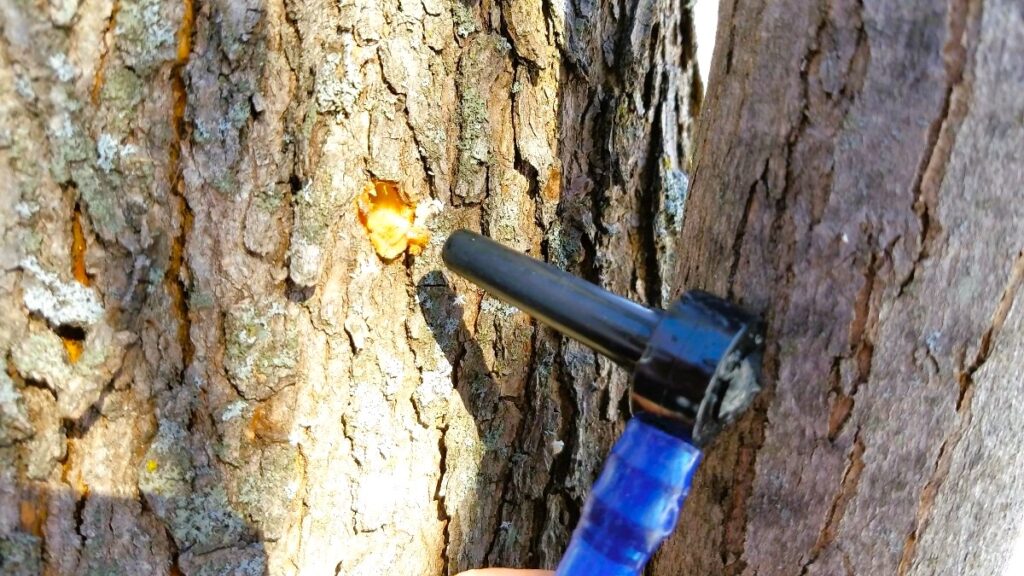
Spiles (or taps) can be made from a variety of materials ranging from plastic to stainless steel.

This set of plastic spiles comes ready to use with the tubing attached, so they are generally easier to use.
Stainless steel spiles are stronger and will last longer. They usually require the tubing to be purchased separately.
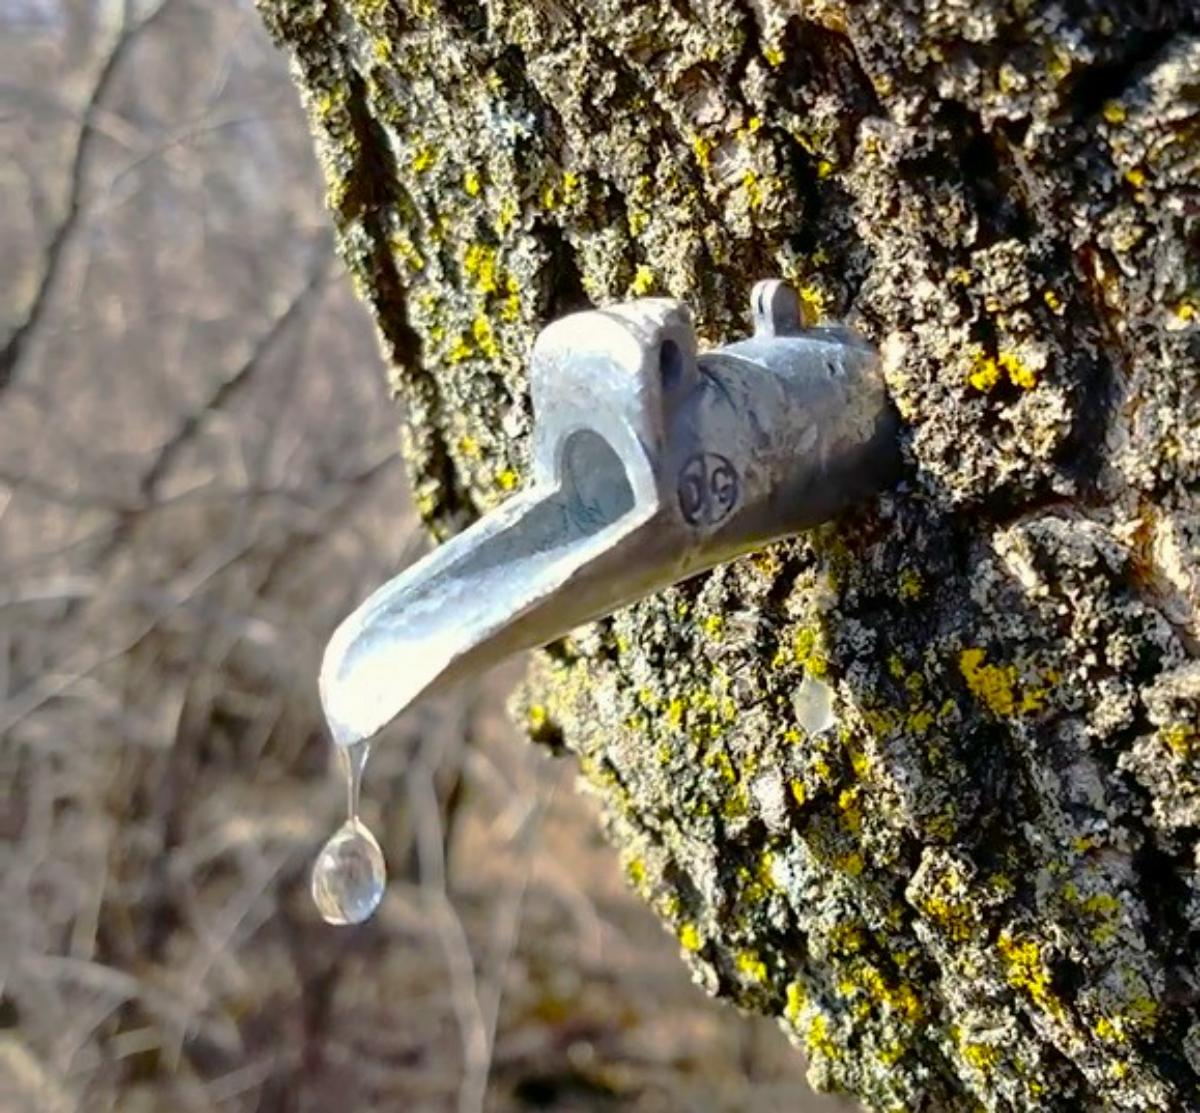
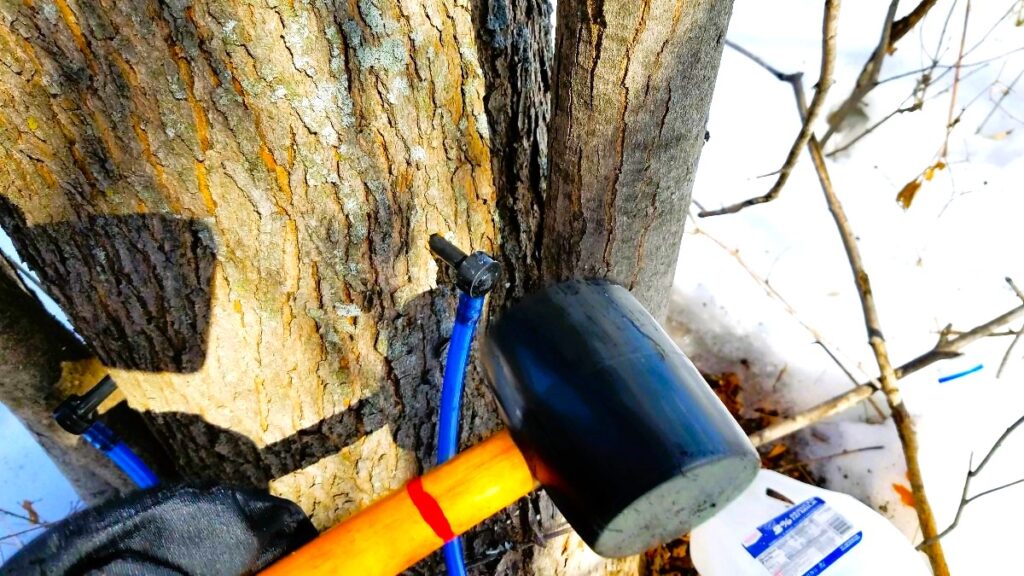
Use a rubber mallet to tap the spile into the hole.
Here is the spile in the hole.


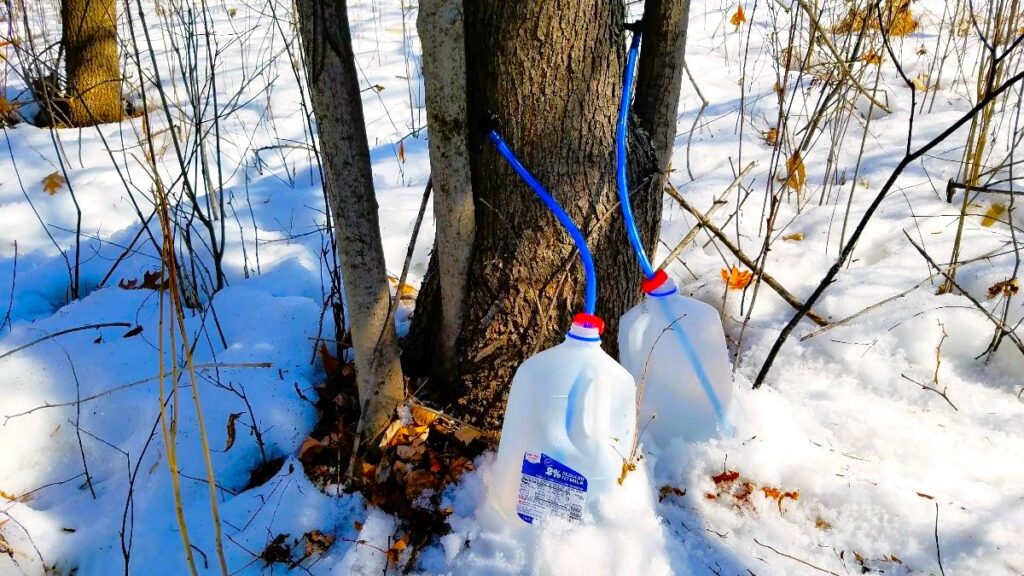
Put the other end of the tubing into your collection container. A really cheap and easy way to collect your sap is to use cleaned out empty milk jugs. I’ve used this method and it works great. The downside is that you have to empty the jugs more often. During the peak of the season, you can get up to a gallon of sap per tap per day!
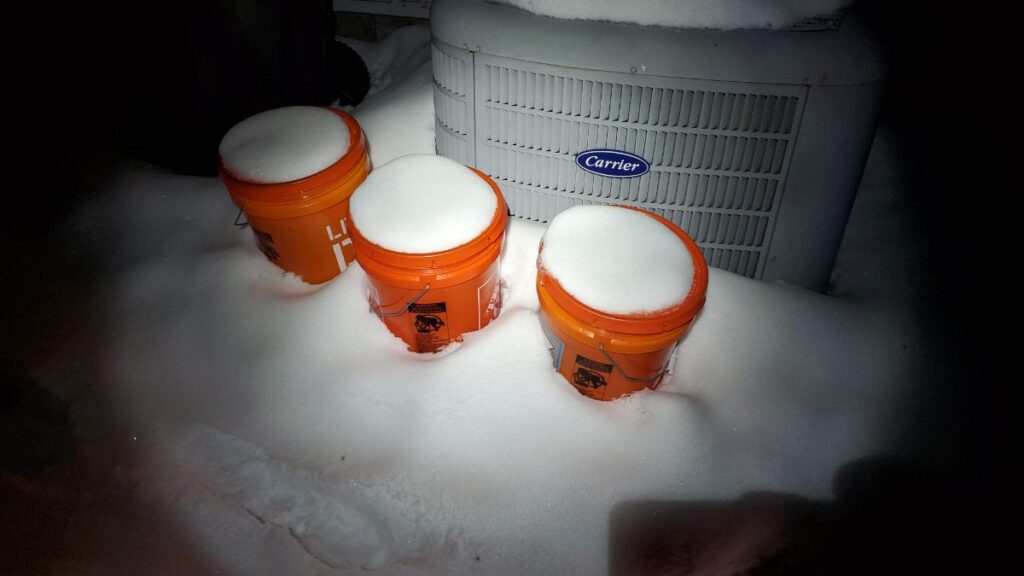
If you expect a lot of sap, or want a sturdier solution, or want to run multiple lines into the same collection vessel, use food-grade 5-gallon buckets.
Choose a light color bucket; you don’t want a dark or black collection container that may heat up in the sun and cause the sap to spoil.
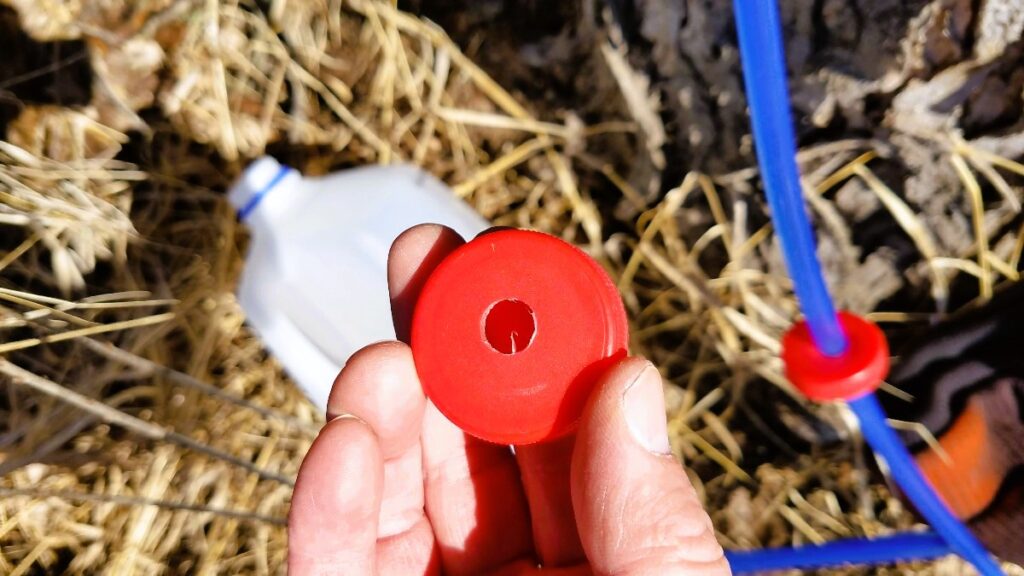
I like to try to seal the top if possible, so I drill a hole in the milk jug cap to run the tubing through. While not strictly necessary, it does help to keep out rain, bark, and bugs.
Run the tubing down to the bucket or milk jugs.

Set the jugs or buckets on ground that is as flat as possible.
Check the taps every day and empty the jugs of sap or swap them out with empties. Collect the sap and keep it in a cool shady place or in the refrigerator if it is not cold enough outside.
Sap can keep for about 1 week before it will start to spoil. You can tell when it starts to spoil because it will become milky.
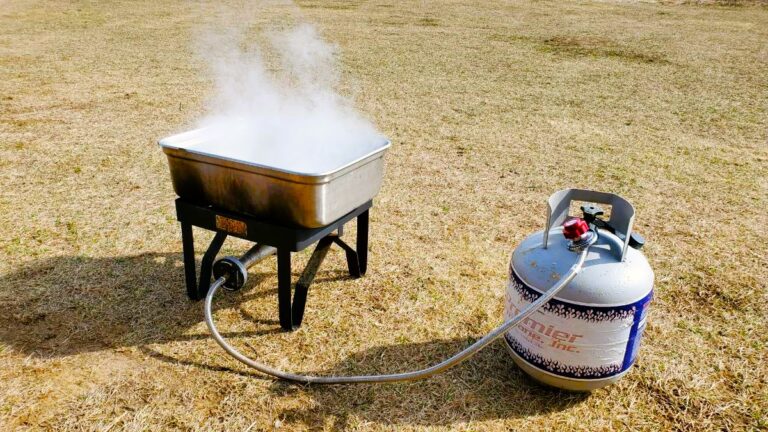
Boiling Maple Sap into Syrup
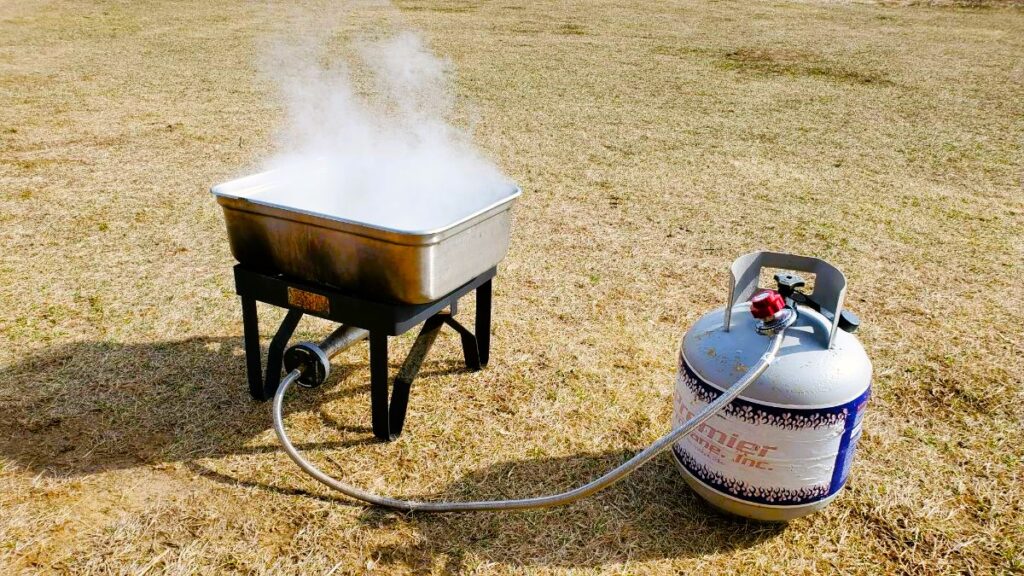
Wait until you have at least 5-10 gallons before you start boiling on a fire or propane boiler. I usually boil the sap in batches of 5 gallons which equates to about 20oz of Maple syrup.
For more details, check out the next post in this series that covers how to boil Maple Sap into Syrup.
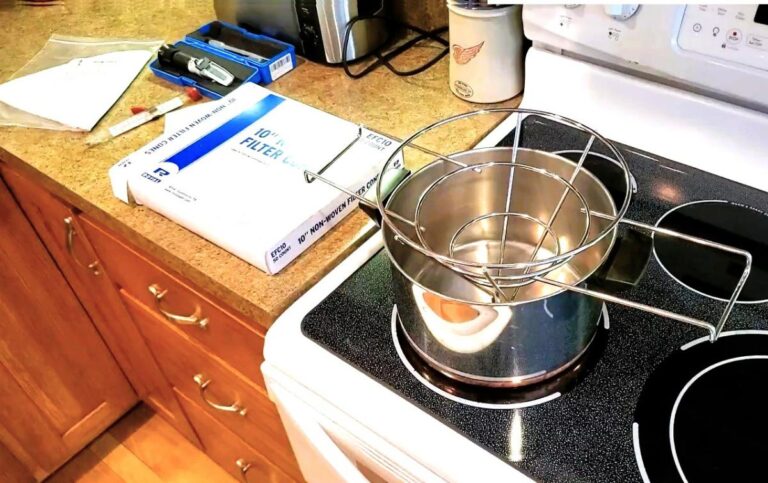
Finishing Boil
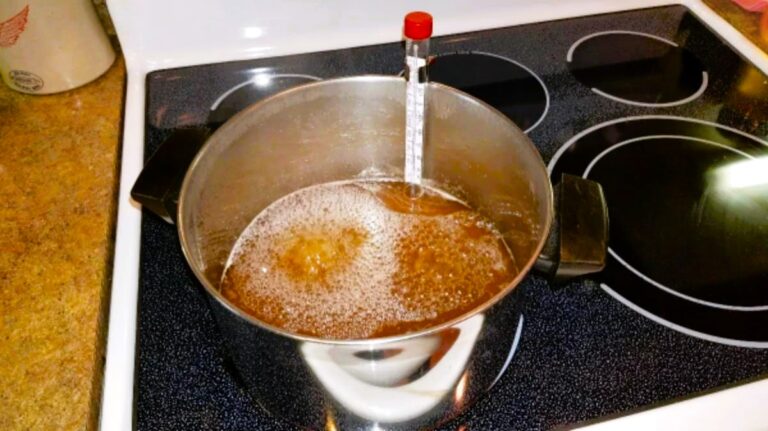
After you have boiled off the majority of the water, it is common to finish boiling the syrup on an indoor stove where you have a little more precise control over the temperature.
Toward the end, the syrup can bubble over pretty fast! You want to be able to fine-tune the temperature to keep that from happening and achieve that perfect Delicious Maple Syrup!
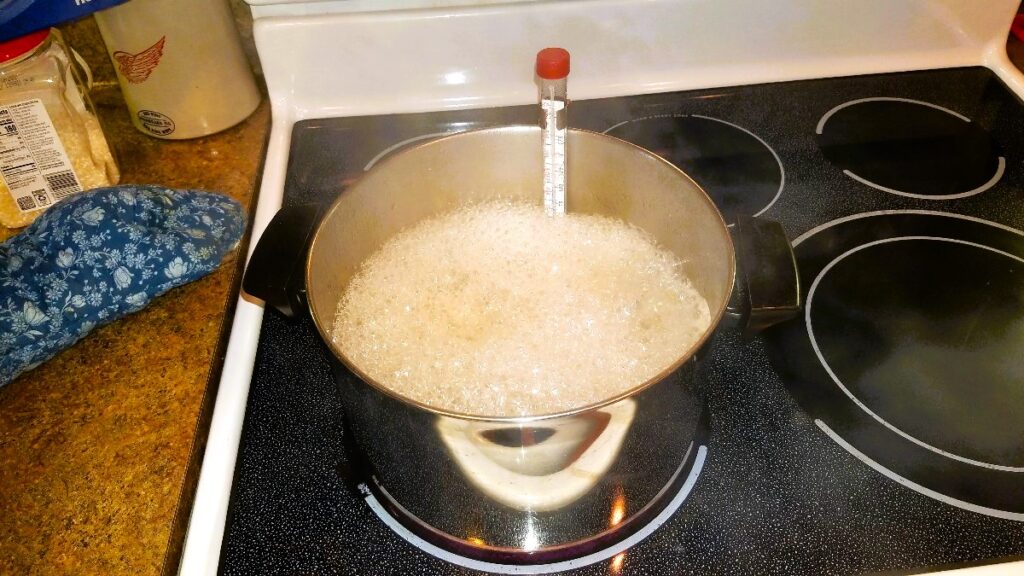
The syrup is done when the sugar content reaches 66% (66 Brix).
For a comprehensive description of how to know when Maple Syrup is done boiling, read our article on How to Perfect the Finishing Boil for Maple Syrup.
How do you know when that is?!?! Use a refractometer!
This simple device uses 3-4 drops of syrup to quickly tell you when your syrup is perfectly done!
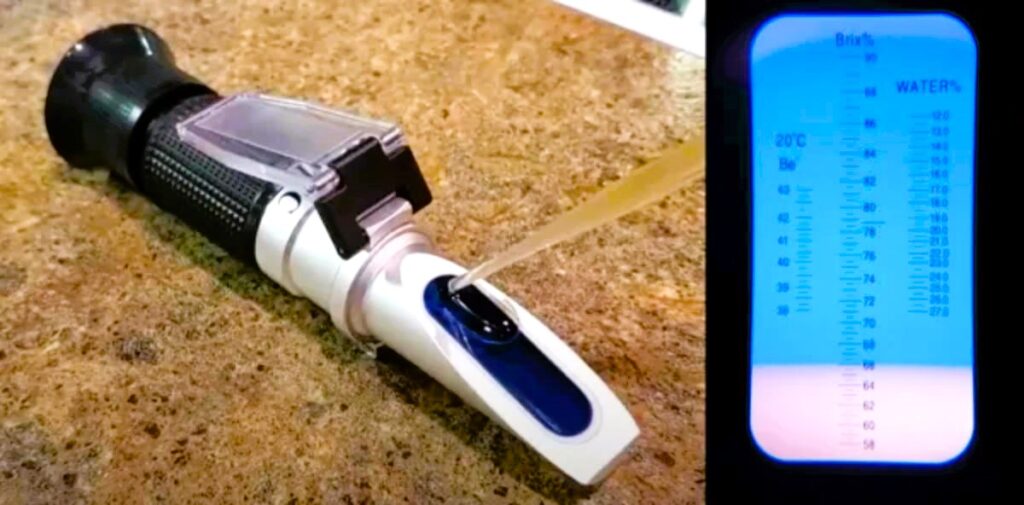
For a detailed explanation, read my article on How to use a Refractometer to Achieve Perfect Maple Syrup.
I hope this post was helpful in describing some best practices for harvesting maple syrup. For more reading, check out the other articles in our Getting Started section.
See these steps on YouTube!
Watch “How to Make Maple Syrup in 4 Minutes” on YouTube.
Check out the “How to Make Maple Syrup Podcast!”
The “How to Make Maple Syrup Podcast!” is enjoyed by thousands of listeners each week during the maple-sugaring season. We’d love for you to join us! We discuss our favorite tips and tricks for making maple syrup as well as interesting information related to the golden elixir!
Click the links below to listen in your favorite podcast player!


Or listen right from your browser:
https://anchor.fm/s/72969138/podcast/rss