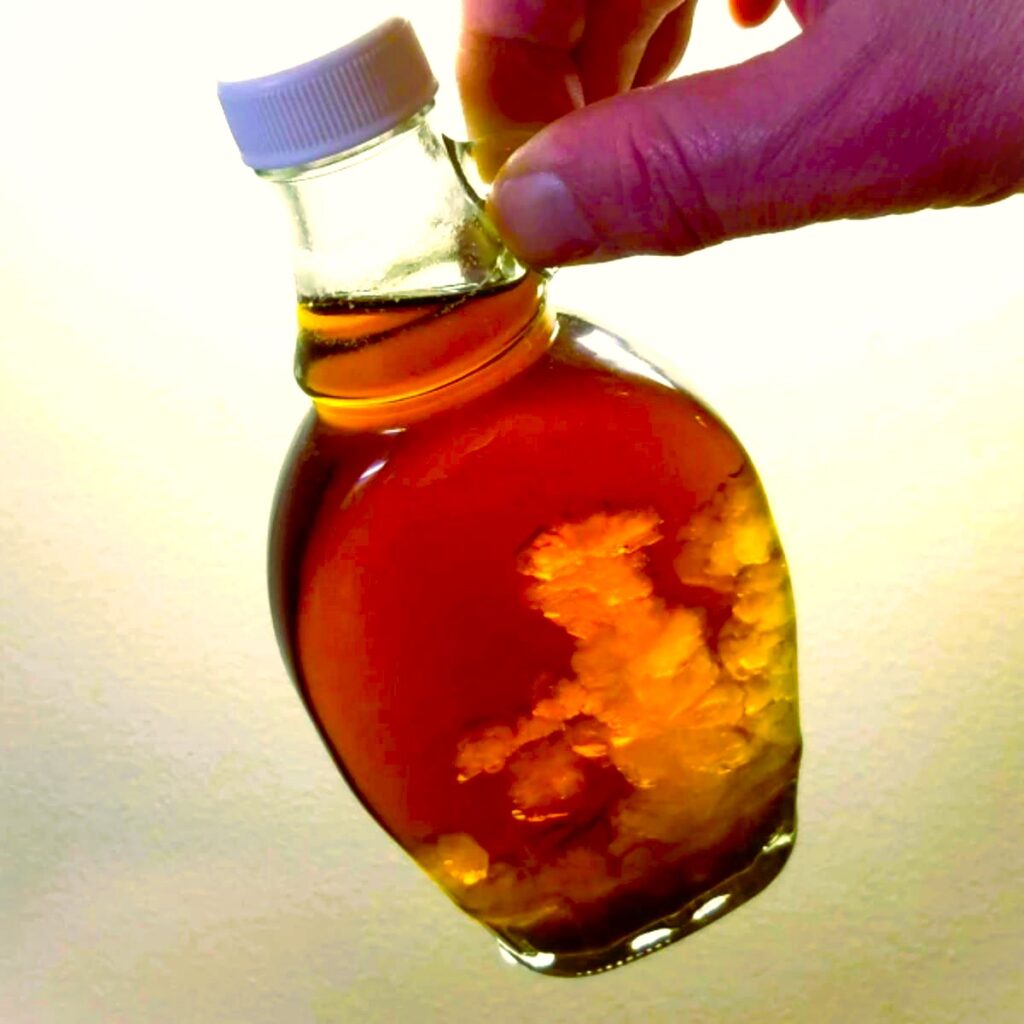
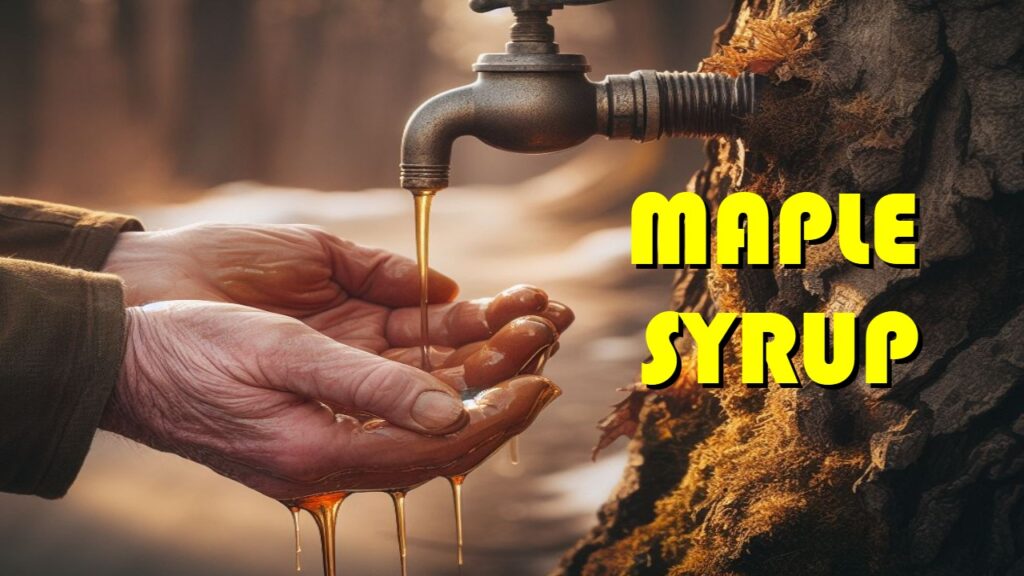
How to Make Maple Syrup
In this picture guide, we’re going to walk through the steps for making delicious, home-made maple syrup! Though there are a lot of fancy ways of making this process really complex, we’re not going to do that here… I’m going to concentrate on making this as simple and easy to follow as possible. Let’s go!
Boiling maple sap into syrup is a fun and rewarding activity. I especially find that my kids love it! It is a great family activity that everyone can participate in.
For more details on making Maple Syrup, visit our articles database!
This post may contain affiliate sales links. Please see my Affiliate Notice for details.

I go into the specifics here, with lots of pictures, and of course you can modify any of these steps as necessary to fit your setup and style. But the reason I do this is that I find it is helpful to go into a lot of detail, especially for those who are just starting out, so that you have a baseline of what has worked for others, and what methods they have arrived at after doing it for years!
I hope this guide is useful to you!
Equipment I Recommend:
These are the supplies I use and recommend for sap boiling:
- Propane Boiler – (or Wood Fire)
- 44 qt Boiling Pot or Boiling Pan or Evaporator
- Wooden Stir Paddle
- Skimming Spoon
- propane tank
- Long Thermometer
- Refractometer
If you have A LOT OF SAP to boil down, or just need to speed up the process, a regular propane burner may not boil down quickly enough for you. In that case I recommend a higher-capacity evaporator with a dual-burner setup.
The following steps are the easiest way to boil maple sap to make your own maple syrup! The process is actually very straightforward.
Follow these steps and you will end up with some really, really tasty maple syrup, and as you go along and gain experience, you may decide you want to tweak the process to your liking, but the method shown here is easy and “tried and true”!
How Much Sap is Needed to Make Maple Syrup?
All you need to do, is boil the sap (which has a sugar content of ~1-3%) until most of the water has evaporated, and the sugar content in the remaining liquid is 66% (“maple syrup”).
A typical question at this point is, “How many gallons of sap is it going to take to get a gallon of Maple Syrup?“
It’s a great question!
A typical ratio for this is determined by using the Jones Rule of 86. Which states that you divide 86 by the sugar content of your sap, and that will tell you the ratio of sap to syrup that you will end up with.
Let’s try an example, a very common sugar content of Maple Sap is 2%. So, take:
86/2 = 43
You will need to boil down 43 gallons of sap in order to end up with 1 gallon of Maple Syrup. Here is a table showing the number of gallons required for trees with different sugar content.
| % Sugar Content | Gallons of Sap | Gallons of Syrup |
|---|---|---|
| 1.5 | 57.3 | 1 |
| 2.0 | 43.0 | 1 |
| 2.5 | 34.4 | 1 |
| 3.0 | 28.7 | 1 |
| 3.5 | 24.6 | 1 |
Why Boil Maple Sap Outside?
I sometimes get the question, “Why don’t you just do all of the boiling on your kitchen stove?” The answer is that, while you could do this, it is generally avoided because of the large amounts of sticky steam that are generated in the sap-boiling process.
The other reason is that it takes several hours or more (depending on how much sap you are boiling down) and if you forget about it (and it boils all the way down) there could be a fire risk, which you would want to avoid inside your home!
The following method is the one that I used based on years of experience doing this with my family as a kid over a wood fire and continuing on now into adulthood.
I have refined my techniques over the years and in this post, I try to go through those techniques, and why I’ve arrived at that way of doing things!
Alright, let’s get started!
How to Boil Maple Syrup – General Overview of the Steps
- Set up a turkey fryer or wood fire in a safe place.
- Fill a boiling pot or pan with 5 gallons of sap (if you have more than 5 gallons you can do this in batches).
- Boil the sap for approximately 4 hours.
- When you have about a half-gallon left in the pot, finish boiling on a stove.
- The syrup is done when it reaches 219°F or 66% sugar content.
Detailed Step by Step Procedure for Boiling Maple Syrup
Note: Click here to download a 1-page PDF "Maple Syrup Making Cheat Sheet" that contains a summarized version of all the steps to making delicious Maple Syrup!
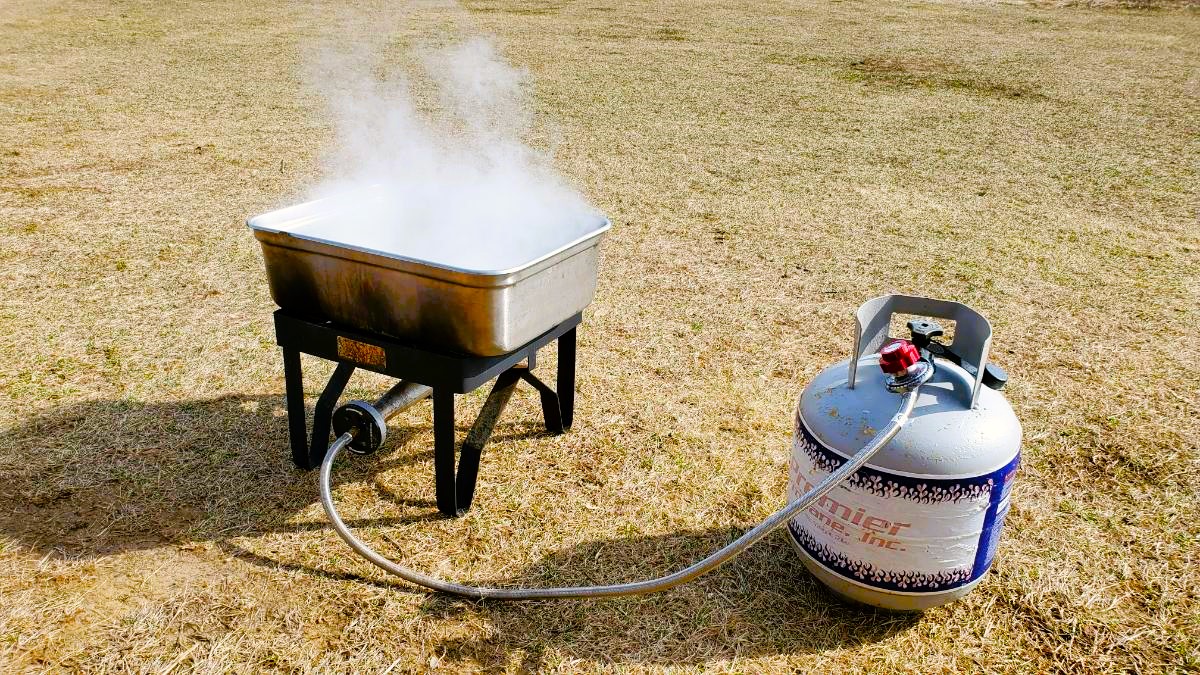
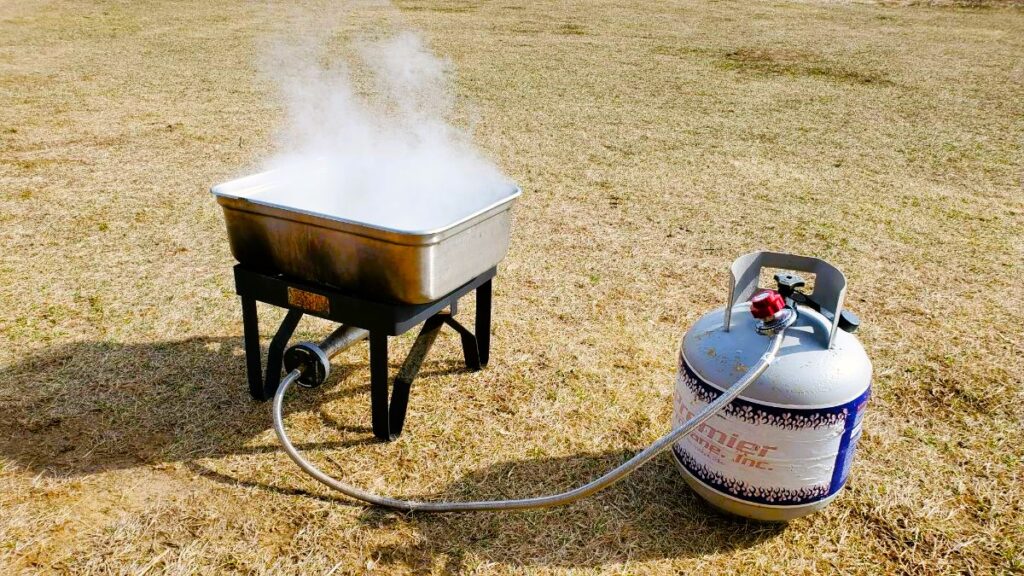
Step 1: Arrange the Evaporator
Set up your wood fire, propane boiler, or Evaporator in a safe place where it won’t start surrounding brush on fire.
I use a propane boiler (“turkey fryer”) mainly because of the ease of use (instant heat) and better tasting syrup.
Wood-burning can make syrup taste smoky, whereas propane burns cleanly – its only byproducts are carbon dioxide and water. But any source of heat should work as long as you can use it to boil the sap.
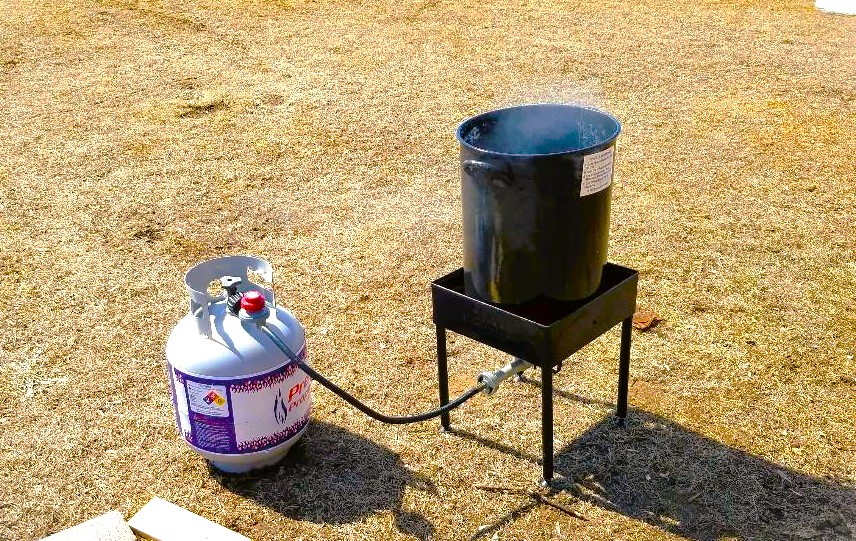
Step 2: Fill the Pot With 5 Gallons of Sap
Pour 5 gallons of sap into your boiling pot and start the boiler.
I often like to start boiling with 2-3 gallons of sap, and once the boiling has started, add a gallon about every hour or so in order to get the boiling to start faster.
In order to increase the surface area of the sap being boiled and therefore increase the rate of evaporation, I’ve also used a cooking pan. Both methods work fine, so feel free to use whichever one is most convenient for you!
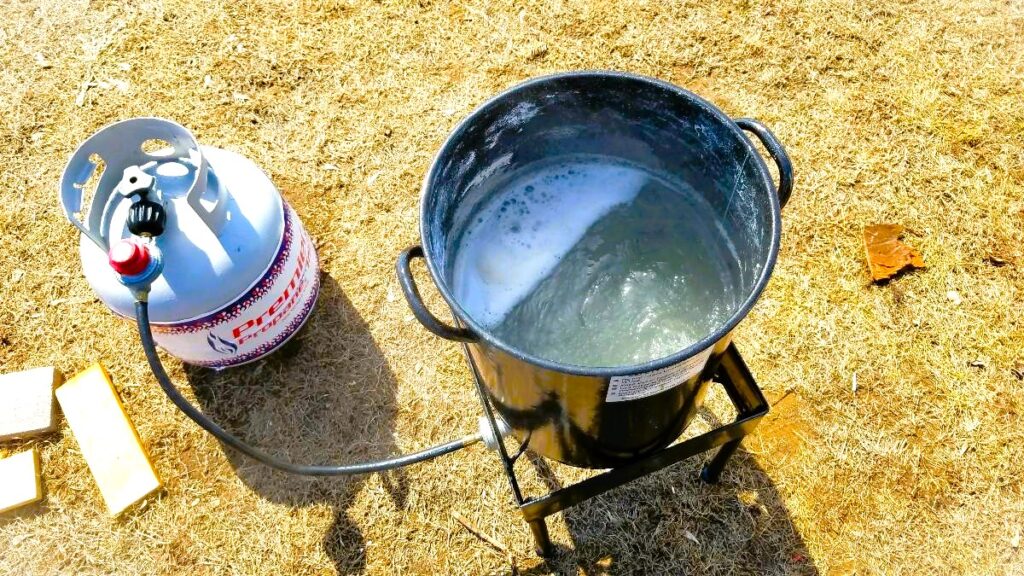
Step 3: Boil the Sap for 4 hrs.
Set it at a medium heat and wait for it to start boiling. Once the sap starts to boil, you may need to adjust the heat slightly so that it keeps a nice rolling boil.
If it is too hot, it will start to boil over. If it is too low, you won’t see bubbles coming up.
Not sure how long you will need to boil your sap? Use the Jones Rule of 86 to find out!
Use a stir paddle to stir the sap occasionally. Once a rolling boil has started, adjust the heat so that it remains rolling without a lot of bubbles and without foam completely covering the top surface.
The goal here is to dissipate steam, if there are a lot of bubbles on top, they can actually have an insulating effect and increase the amount of time it takes to boil off most of the water.
Watch the steam coming off the top and when you have this maximized, that is the temperature you want to remain at.
In the picture below, the sap has been boiling for about 1 hour.
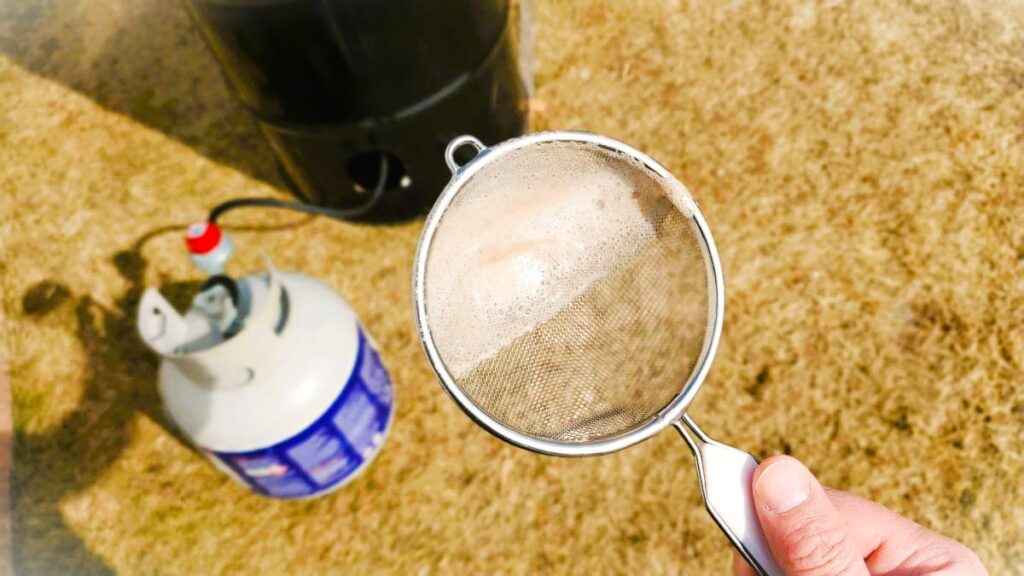
Every now and then skim the foam off of the top using a skimming spoon.
Getting rid of the foam will help cut down on the cloudiness of the final product and allow for more and faster evaporation of the excess water.
Continue to boil down the sap until you have about 1.5″ to 2″ of sap in the bottom of your kettle.
This will take about 4-5 hours. This will get your sap to about the 10:1 ratio.

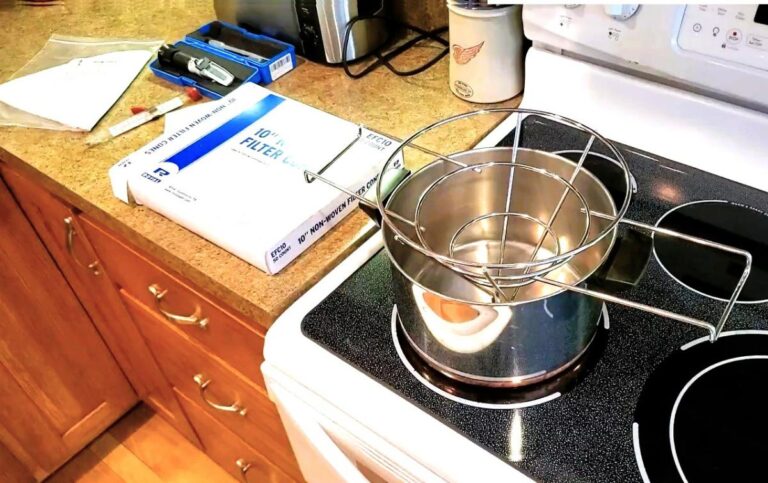
Step 4: Finish the Boiling on a Stove
In the following picture, the sap is nearly done boiling outside, notice the rich dark color of the sap, which is due to the Maillard Reaction.
Soon, we will turn off the burning and bring the sap inside for the final boiling.

Finish boiling the sap to the final sugar content on an indoor stove – for more control.
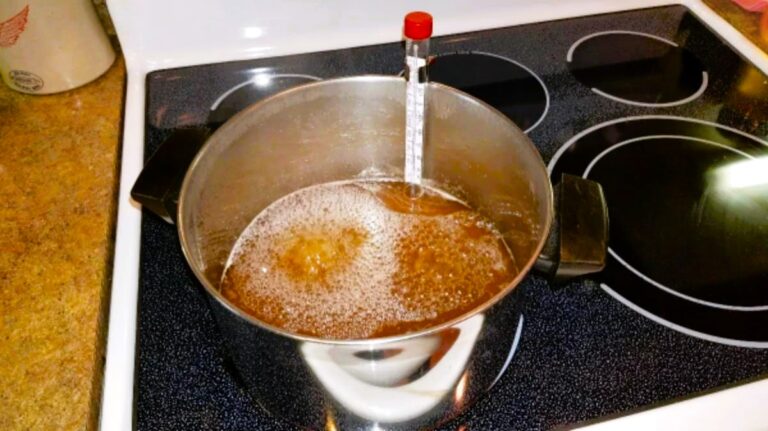
Step 5: The Syrup is done when it reaches 219°F or 66% Sugar Content
I recommend doing the ‘finishing boil‘ on a stove so that you can keep a closer eye on it as well as to monitor the temperature more closely.
It is not exactly obvious when the syrup is 'done.' Technically it is done when it has reached 66% sugar content.
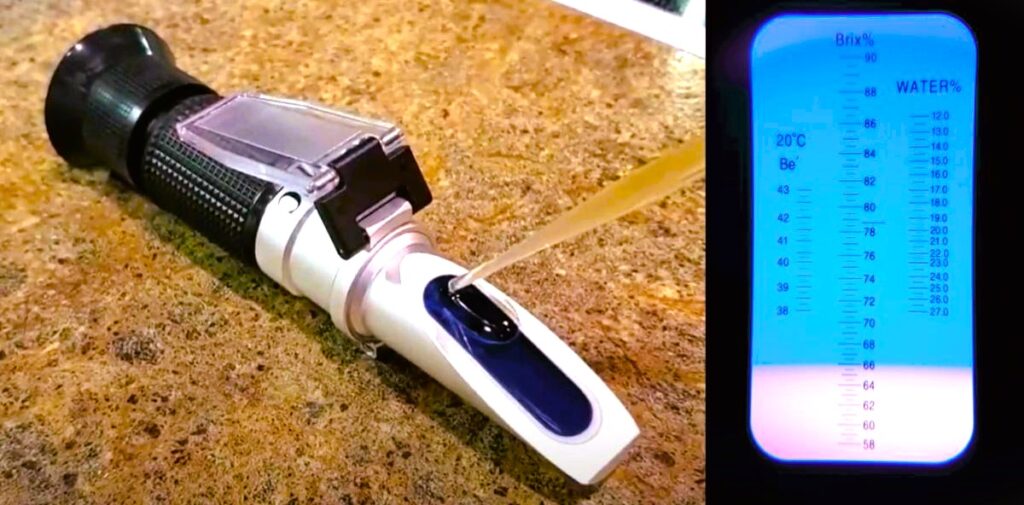
Use a candy thermometer to estimate when the syrup is done boiling. The point at which it is done is when the temperature reaches 219°F (or 7 degrees hotter than the boiling point of water!).
You can measure this exactly with a kitchen refractometer – an inexpensive device that looks like a kaleidoscope that measures the sugar content of syrup by dripping a few drops onto its viewing slide.
Newsletter
Sign up for my newsletter in order to get helpful hints for Maple Syrup right to your inbox!
People Also Ask…
Some additional common questions related to making Maple Syrup:
Frequently Asked Questions About Boiling Maple Syrup
How Long Does it Take to Boil Maple Syrup?
I find that it takes about 4 hours to boil down 5 gallons of Maple sap into syrup. This time may vary depending on the sugar concentration of your sap and your evaporator (method of heating the sap).
What do you Use to Make Maple Syrup?
In general, you need spiles and collection vessels to collect Maple sap from the tree, and a way to boil the sap down into syrup. Check out my Maple Syrup Resources page for the specific equipment used for making Maple Syrup at home.
How do I know when Maple Syrup is done boiling?
Maple Syrup is done boiling once it has heated up to 219 degrees Fahrenheit, or 66% sugar content. Water boils at 212 deg F. As the water boils off and the syrup becomes more concentrated, the boiling point increases gradually. Once the temperature of the syrup has reached 219 deg F (or, more precisely 7.1 deg above the boiling point of water at your altitude), your Maple Syrup is done!
To see this in action, check out this video: How to Know When Maple Syrup is Done Boiling on YouTube.
Can you stop boiling sap for the night?
Yes, you can! I frequently do this. If the sap is not done boiling, you can take it off the heat for the night. The sap/syrup should be kept cool (around 35 deg F or colder), such as in a refrigerator or outdoors if the temperature is cool enough. It is also recommended to cover the pot or boiling vessel so that insects and other detritus does not fall into the sap.
One thing to be aware of is that if you stop for the night (or any length of time) the final syrup will become darker than it would have been if you had boiled straight through, due to the extended time over which the Maillard Reaction takes place.
Why does my homemade Maple Syrup Crystalize?
Crystalized maple syrup typically occurs when the sap is boiled too long, and the sugar content has increased beyond 68.9% sugar content. Pure Maple Syrup should have a sugar content between 66-68.9%. You can measure the exact sugar content of your syrup while boiling by using a maple syrup refractometer.
A common cause for crystalized maple syrup is the use of an inaccurate thermometer. Pure Maple Syrup boils at 219.1 deg F (most people just use 219 deg F). To check your thermometer, boil some water and verify that the temperature of boiling water is 212 deg F, or the expected temperature at your altitude (barometric pressure/temperature).
Can you over boil Maple Syrup?
Yes, you can over boil Mape Syrup. You should boil it to 219 deg F and then stop. Pure Maple Syrup should have a sugar content between 66-68.9%. You can measure the exact sugar content of your syrup while boiling by using a maple syrup refractometer. Once your syrup reaches 66% sugar content, remove it from the heat.
What temperature does Maple Sap boil at?
Initially, Maple sap will boil at a temperature very close to that of water (212 deg F at standard temperature/pressure). However, as water boils away in the form of steam, the sugar in the sap is concentrated and the temperature at which the solution boils will increase. Maple sap officially becomes Maple Syrup once the boiling point has reached 219.1 deg F, or 7.1 deg F above the boiling point of water.
Maple Syrup Resources
There are a lot of resources available online for wisdom on making your own Maple Syrup. I’ve compiled a number of links to free eBooks, guides, templates, and equipment, and put them together on my Maple Syrup Resources page.
See these Steps on YouTube!
Play the “How to Make Maple Syrup Podcast!”
The “How to Make Maple Syrup Podcast!” is enjoyed by hundreds of listeners each week during the maple-sugaring season. We’d love for you to join us! We discuss our favorite tips and tricks for making maple syrup as well as interesting information related to the golden elixir!
Check out my podcast on How to Make Maple Syrup!
https://anchor.fm/s/72969138/podcast/rssClick the links below to listen and subscribe in your favorite podcast player!


Or listen right from your browser: