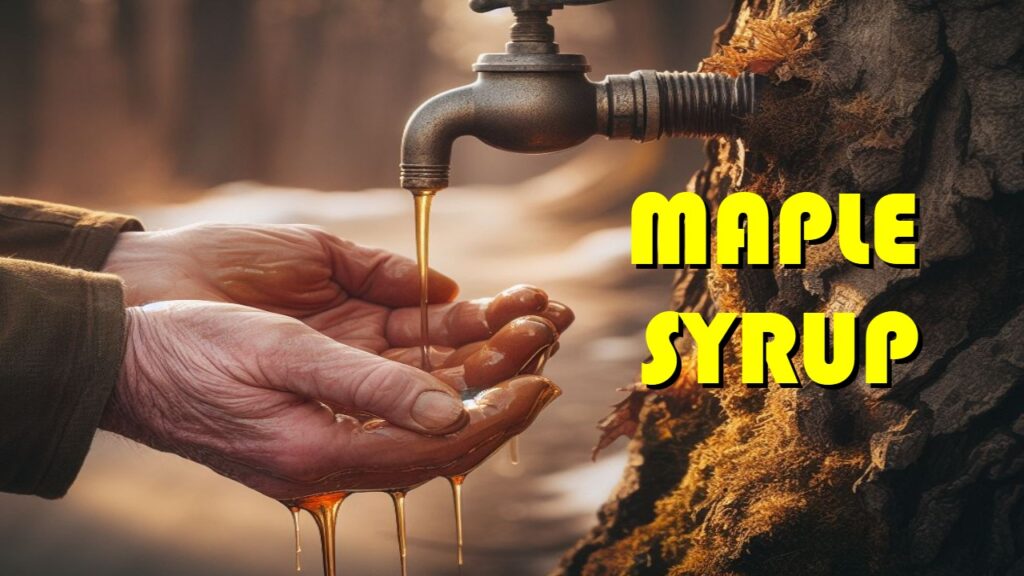
How to Perfect the Finishing Boil for Maple Syrup
This picture guide walks step-by-step through the process of performing the finishing boil for maple syrup.
After harvesting your maple sap and doing the initial boiling, it is important to pay close attention as you near the end of your boiling. You will need to make sure that the syrup hits just the right temperature without boiling over!
This post may contain affiliate sales links. Please see my Affiliate Notice for details.
Finishing Boil for Maple Syrup
The final stage of boiling down sap, often called the ‘finishing boil,’ is best done in a controlled way (i.e., on a stove) so that you can maximize the likelihood of producing perfect maple syrup that hasn’t been overdone (creating crystals or ‘rock-candy’) or underdone (watery syrup).
It can also be more conducive to bottling the syrup in a food-safe way.
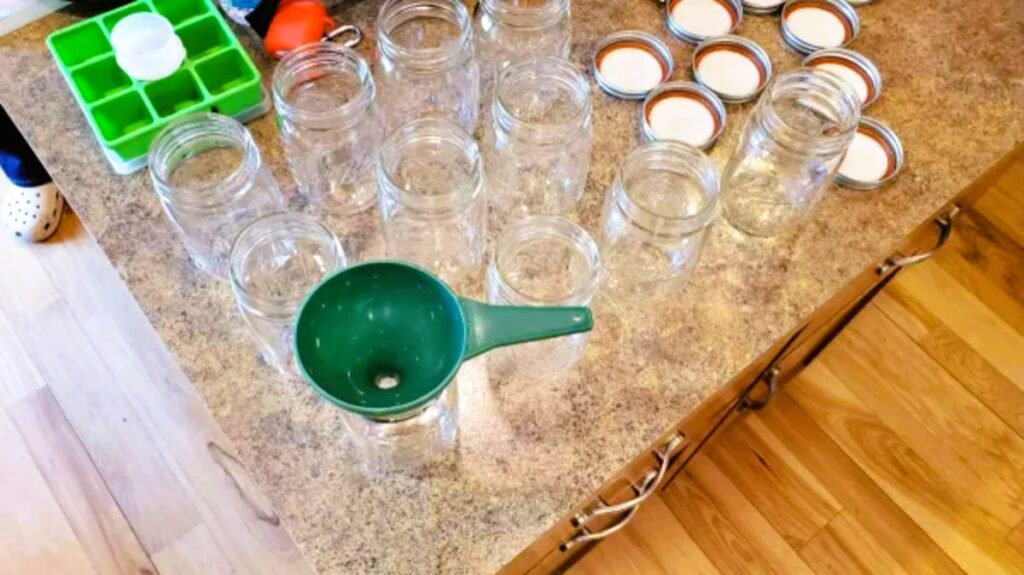
What You’ll Need:
- large pot (5 quart)
- candy thermometer or digital thermometer
- canning jars and extra lids
- maple syrup bottles (with pinky-hook – very important)
- syrup filters (pack)
- synthetic filter for final filtering
- filter stand or strainer
- food-grade funnel
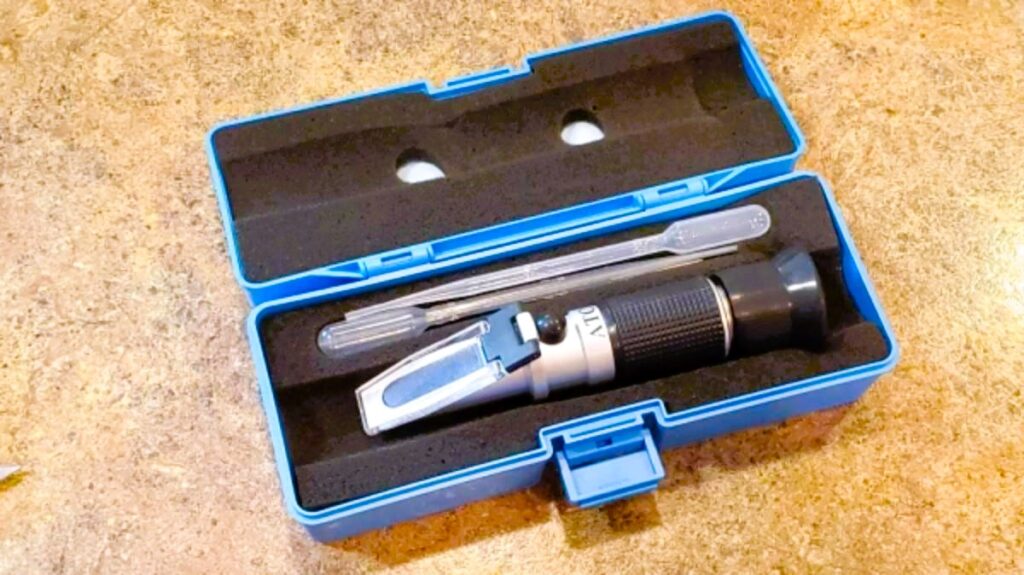
- refractometer or hydrometer
Summary of the Steps
We will follow these steps to perform the finishing boil on maple syrup:
- Tap your Maple trees and collect the sap.
- Boil the majority of the water off on an outdoor boiling setup or Evaporator
- Pre-filter the sap to remove larger debris.
- Boil the Sap until it reaches a temperature of 215°F on a candy thermometer.
- Filter the syrup with a mesh syrup filter.
- Continue boiling the sap to a temperature of 219°F.
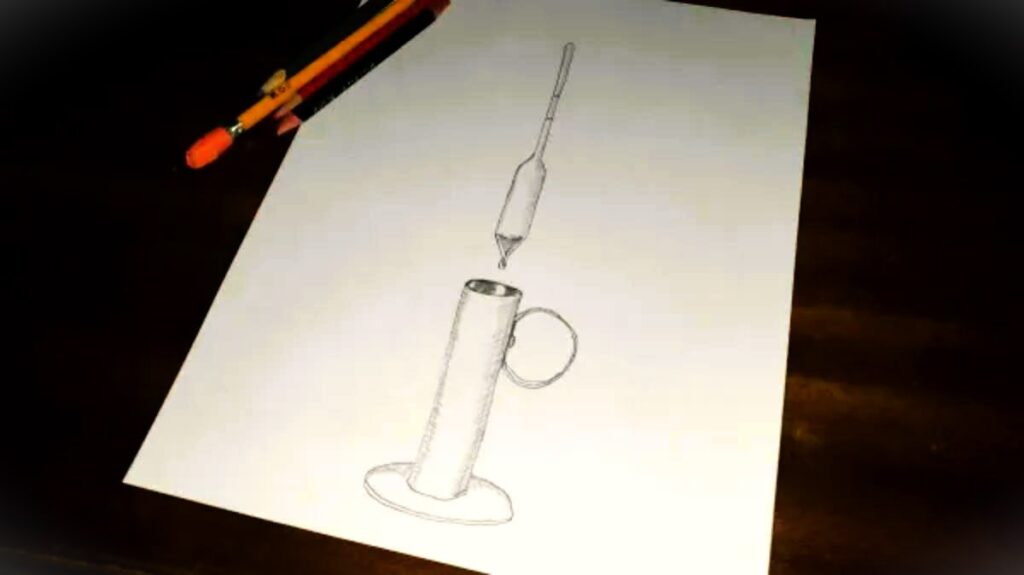
- Drip a few drops of syrup onto the viewing slide of a refractometer and read off the sugar content.
- When the syrup reaches a sugar content (brix) of 66%, stop boiling.
- Allow the syrup to cool to 190°F, then pour it through both a mesh filter and a damp synthetic filter.
- After filtering, and while still hot, pour the syrup into sterilized jars or bottles for long-term storage, or put it into the refrigerator to enjoy immediately!
In the next sections, we go into detail on each of these steps…
(For all the steps and more information on making Maple Syrup, be sure to check out the “Basics” section of this website!)
How to Finish Boiling Maple Syrup – Step by Step Guide
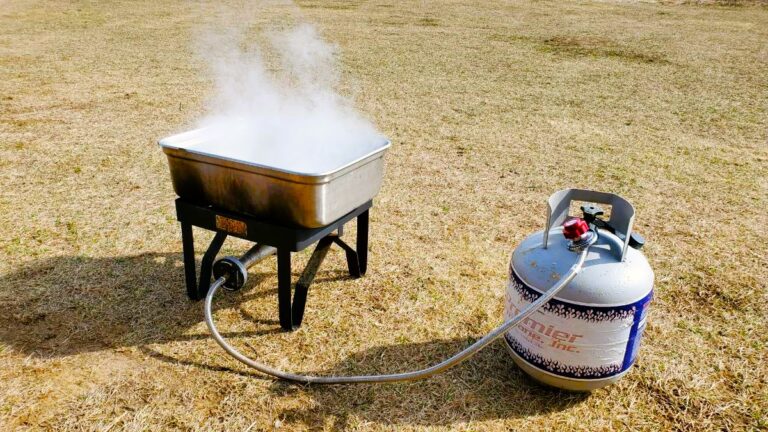
This article assumes that you have already performed the bulk of the boiling of your maple sap to evaporate off most of the water content over a wood fire, a homemade contraption of some sort, or a propane turkey fryer.
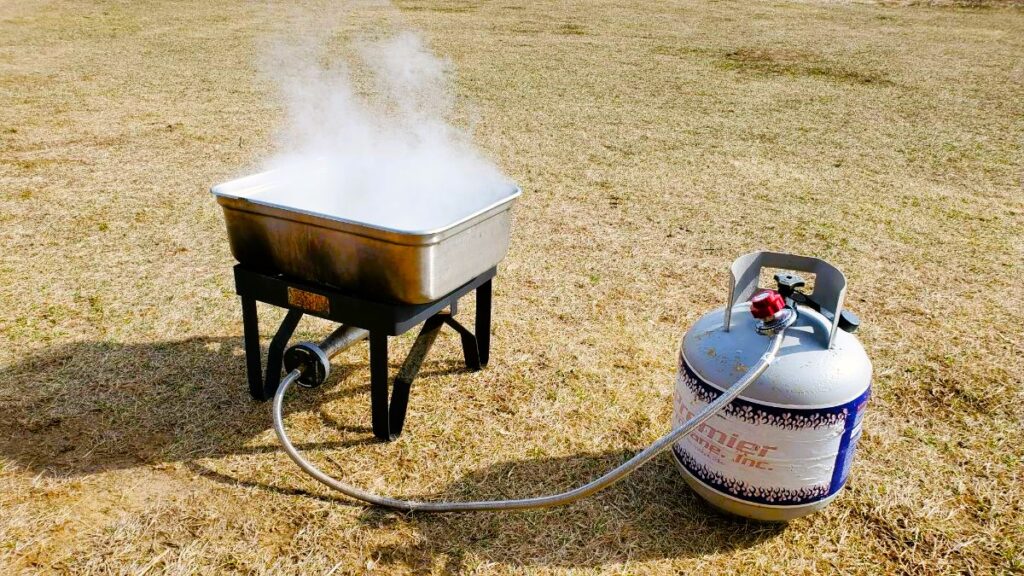
If you have a LOT of sap to boil down, I recommend a higher-capacity evaporator with a dual-burner setup with the wind-guards.
The steps in this article go through how to finish boiling the sap to the correct consistency for perfectly flavored maple syrup!
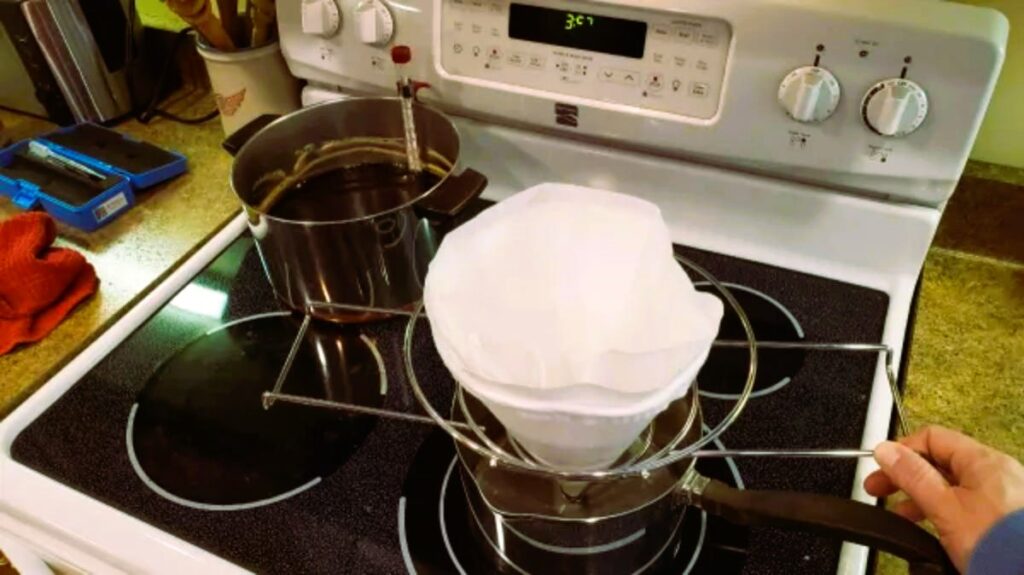
1 – Pre-Filter the Syrup to Remove Larger Debris
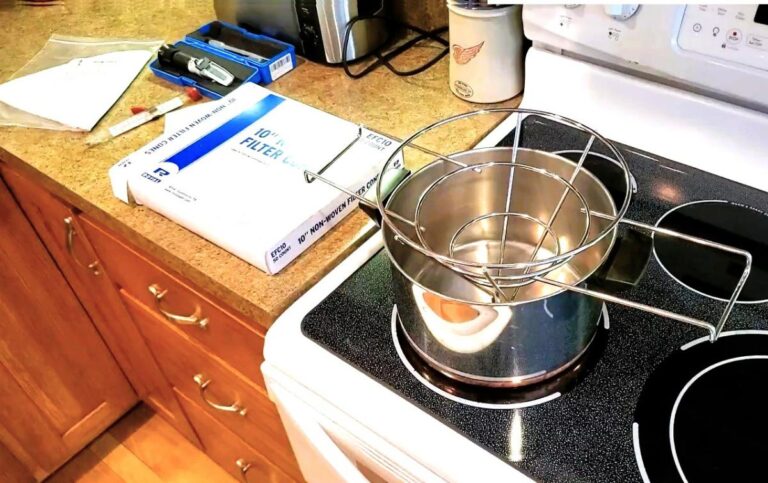
To perform this step, we will want to poor the sap from your outdoor boiling vessel into a large 5-quart pot or similar, then put it on the stove.
But before doing this, filter the sap to remove any residue that has accumulated during the initial boiling phase. This will help to remove larger residue that remained in the sap from the initial boiling.
Sugar sand and Niter are natural precipitates that form in Maple Syrup as it is heated. They are not harmful to consume but are often filtered out in order to reduce cloudiness and increase the clarity of Maple Syrup.
Use a syrup filter and position it in a filter stand or strainer.
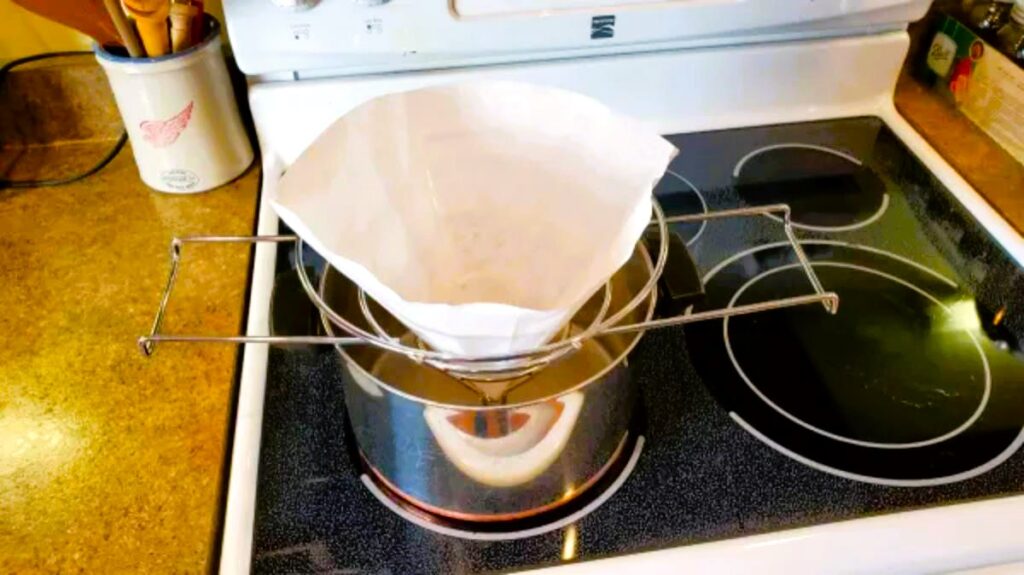
Pour the sap through it. If the syrup filter gets too clogged and slows the filtering process, replace it with another one.
The filters are cheap and come in a pack of 50 or so. They are reusable and are easy to rinse out, so I like to have a couple handy to swap out if the filtering gets too slow.
Another common filter material used by many maple syrup makers is cheesecloth, which is the more traditional method of filtering sap.
Here is a photo showing the syrup filter after one round of filtering. You can see the sugar sand and particulates collected in the bottom of the filter.

This is a view of the maple syrup sugar sand caught in the filter.
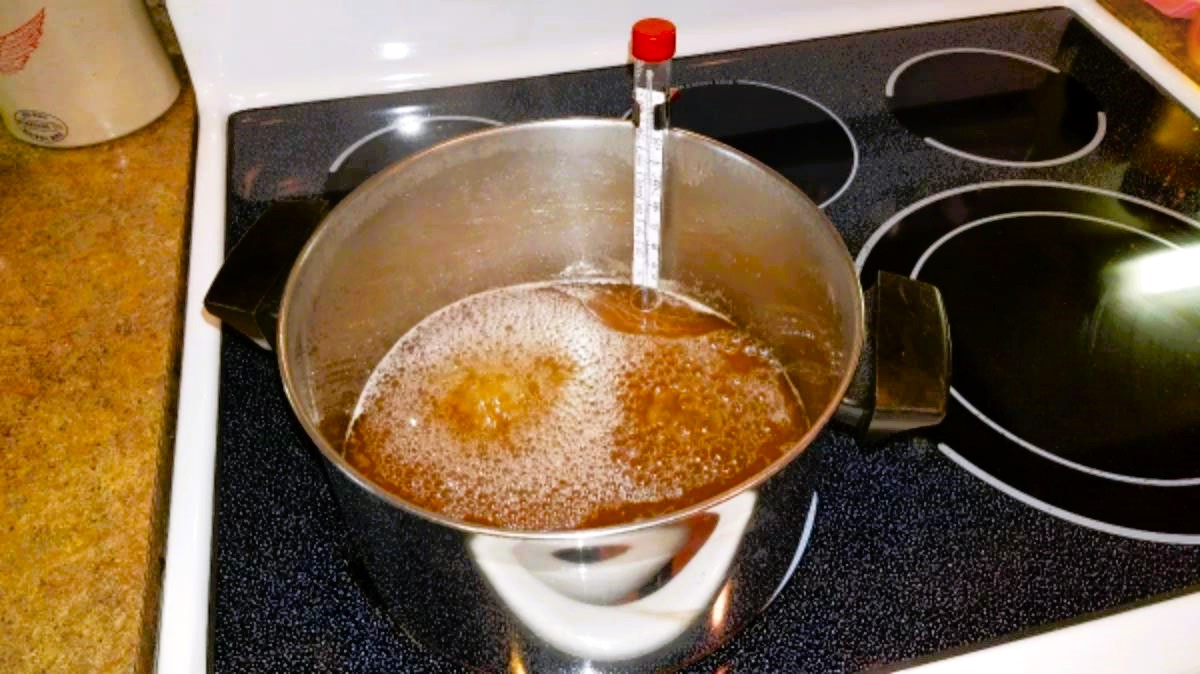
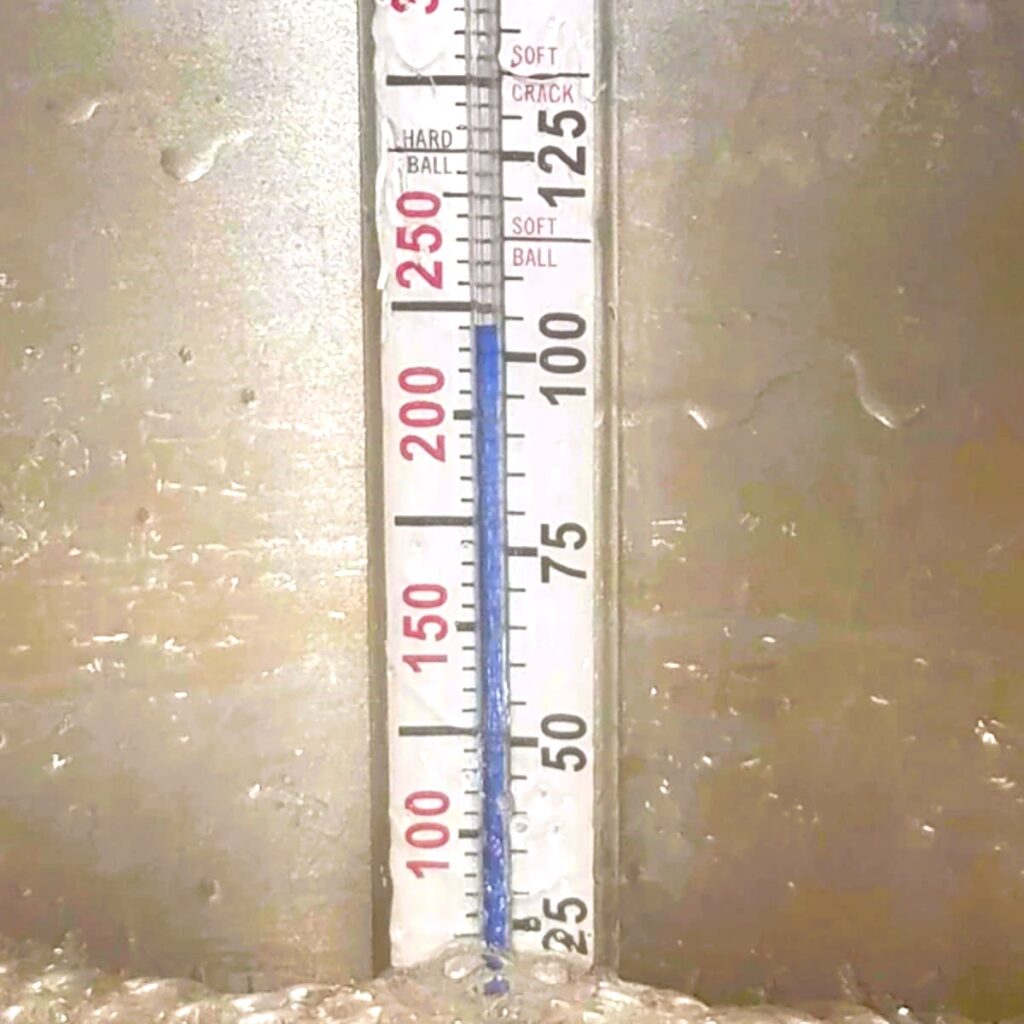
2 – Boiling the Maple Sap to 215°F
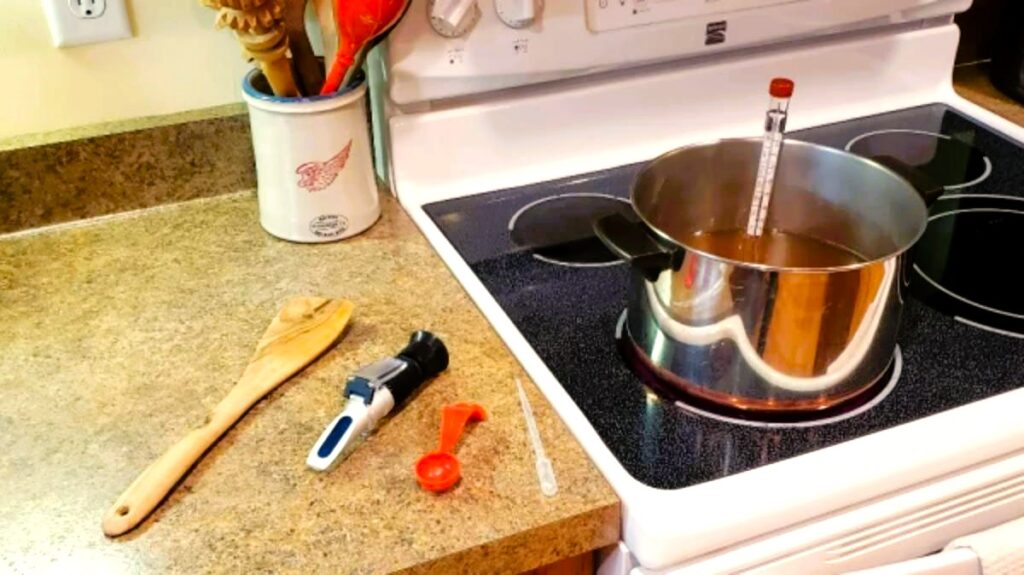
Once the sap is filtered, put it into the large pot and start up the stove and set it to a medium heat to get the sap boiling again. Insert your candy thermometer or digital thermometer so that the bulb is submerged in the sap, but not touching the bottom of the pot.

This spatula thermometer allows you to stir, take measurements and keep the thermometer from touching the bottom of the pot, all at the same time. In general, syrup does not require a lot of stirring, since the bubbles naturally ‘stir’ the pot!

Maple syrup boils at a higher temperature than water due to its sugar content. Water boils at 212°F, while maple syrup boils at 219°F.
For this reason, you want to continue boiling your sap until it reaches a temperature of 219°F.
Note: In general, you want to boil the sap until it reaches a temperature that is 7°F above the boiling temperature of water. So, if your area differs significantly from 212°F, add 7°F to the boiling point of water at your location.
3 – Filter the Syrup Once it has reached 215°F
A good practice to remove residue and reduce the amount of ‘sugar sand’ (or ‘niter’) that collects in your syrup, is to filter the syrup again at 215°F. Use another syrup filter as during the first filtering step.
Sugar sand develops during the boiling process as a precipitate, so it is not enough to filter just once, since the sugar sand is continually being created as the water evaporates off.
4 – Boil the filtered sap to 219°F
After filtering at 215°F, put the syrup back on the stove and continue boiling until it reaches 219°F.
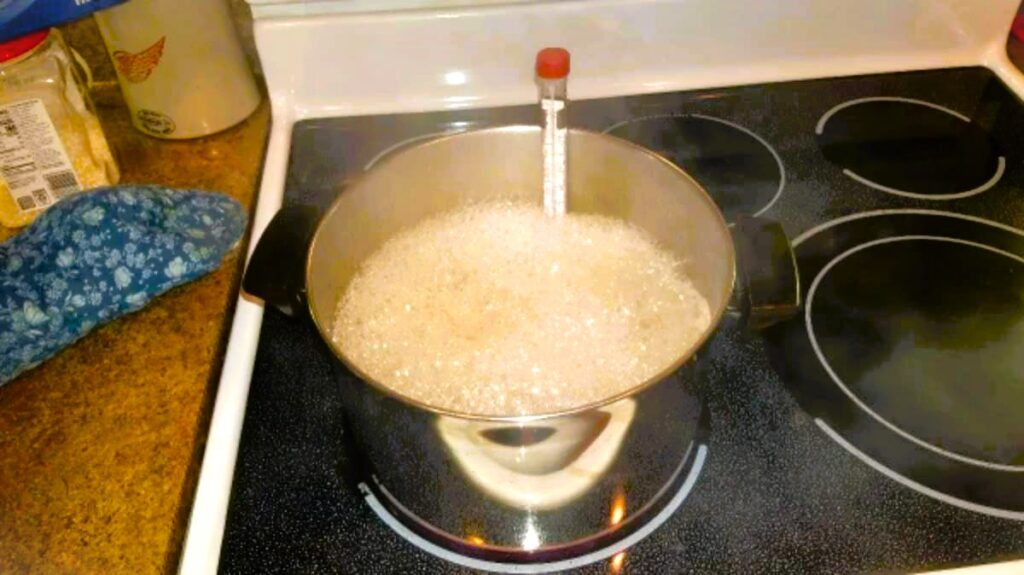
A couple of clues will occur as you approach the time when the maple syrup is done. You will notice that the consistency of the syrup seems to change as you approach the 219°F temperature.
Watch for these tell-tale signs:
- The syrup will suddenly want to bubble over! The heat setting that you have been using on your stove all along, will suddenly be too hot. Often this will happen the instant you put a spoon or stirring stick into the syrup. Turn the heat down little by little to keep the boiling going but to stop the syrup from boiling over.
- The bubbles will change consistency and turn into larger, more viscous, more spherical, and stickier bubbles than before (not foam), like below.
There may be a temptation to go to higher temperatures in order to achieve thicker syrup.
While this is the case, and the syrup will become thicker, it will also become more prone to crystallization.
Below is some maple syrup that was heated to 230°F. After several weeks on the shelf, significant ‘rock-candy’ crystallization had occurred.
How Do You Know When Maple Syrup is Done Boiling?
Once the sap has reached 219°F, let it boil at this level for another minute or so, then it is done. I find that knowing exactly when to stop boiling can seem a bit arbitrary!
It depends on how accurate your thermometer is, how quickly you get the syrup off the heat, and it’s easy to end up just ‘guessing’ when it is done. That is why I now use a refractometer.
According to the International Maple Syrup Institute, real maple syrup has between 66% and 68.9% sugar content. You want the syrup to be between 66-68.9% on the brix scale (66-68.9% sugar content) because lower than 66% and your syrup will be too watery.
And above 68.9%, your syrup will start to crystalize in the jars. So ideally, you measure the sugar content directly instead of only going by temperature.
The traditional method of measuring sugar content is to use a hydrometer. To use a hydrometer, you fill a test cup with syrup, then gently place the hydrometer into the syrup allowing it to float, then read off the number right at the surface level of the syrup.
(A set of instructions on how to properly use a hydrometer can be found here.)
Hydrometers can be a bit confusing to use and lack precision unless you have built up experience using one. And since they are made of thin glass, they are quite fragile and prone to breaking.
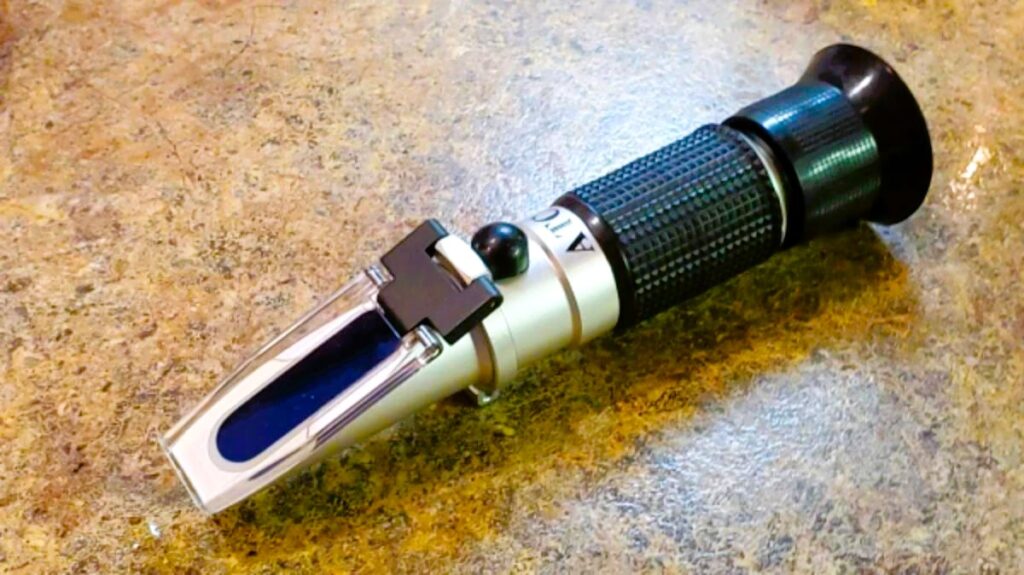
After struggling to get good, consistent maple syrup, I finally stumbled onto the use of a refractometer. This device removes the ambiguity and allows you to be extremely precise by measuring the sugar content (brix %) directly.
This is what I use now, and it is so much easier, since it only requires a few drops of syrup.
For some reason I assumed a refractometer would cost hundreds of dollars, luckily, they don’t – far less, I was actually surprised at how inexpensive they are.
A refractometer costs less than a hydrometer, is less fragile, and is easier to use!
Ever since I bought one, it has made the whole maple syrup boiling process much simpler and removed the guesswork!
Using a refractometer has allowed me to achieve perfect syrup! If you’re on the fence, I highly recommend getting one, you won’t regret it.
Here is my refractometer in use.
The maple syrup will boil for a long time at 212ºF, then it will start to climb. I watch the candy thermometer as a reference, and when it is indicating about 215ºF I start sampling with the refractometer.
I take a few drops from the pot and drip the syrup onto the viewing slide, then close the lid.
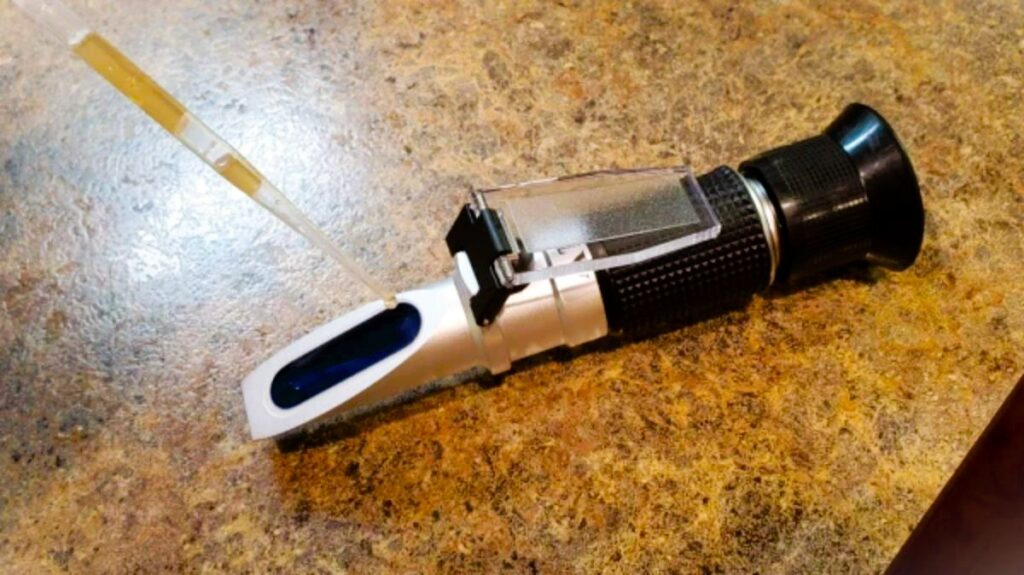
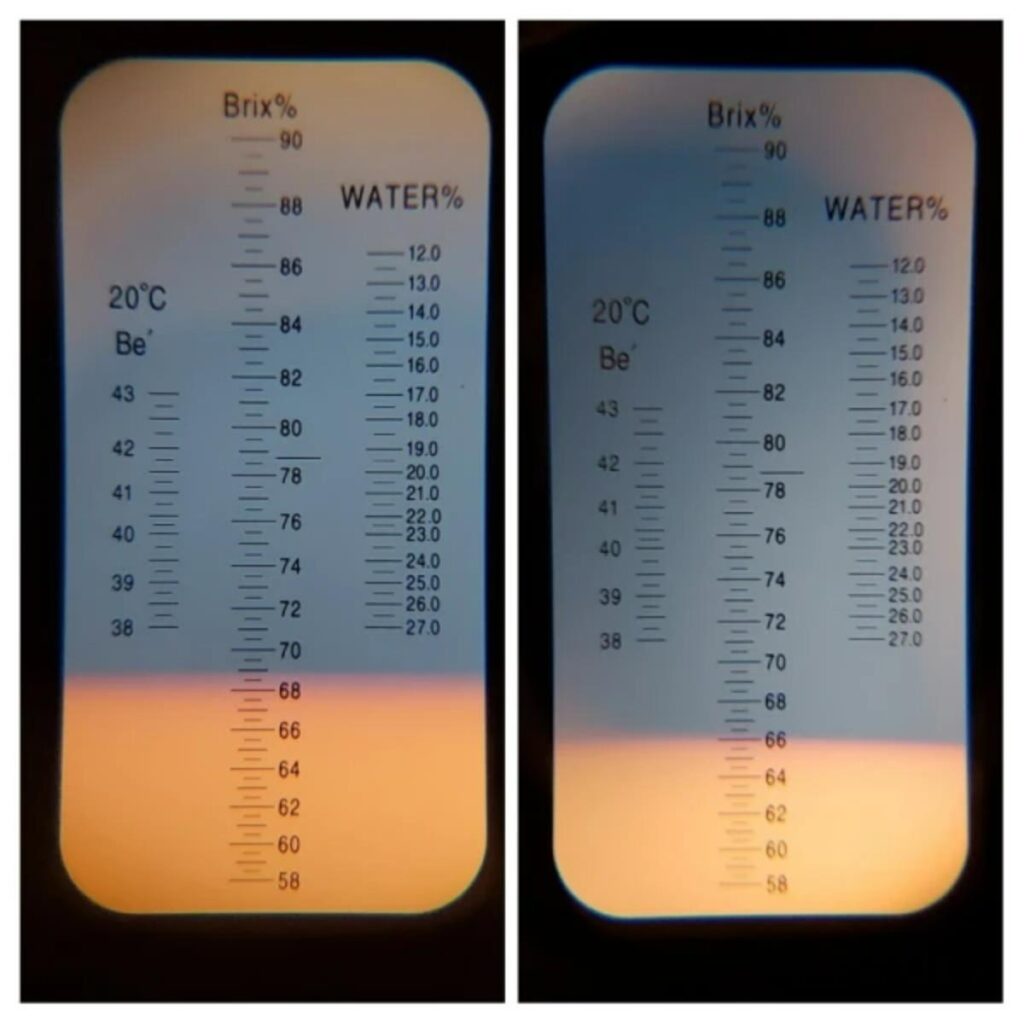
After that, look into the viewport to read off the % sugar concentration (brix value). The line between blue and orange indicates the % sugar in your syrup.
This is not a ‘digital’ refractometer, it is analog (doesn’t require batteries). I read somewhere that a person thought it required sunlight – it doesn’t.
All I use is the normal overhead room light, and then look in the viewport (like a telescope), and it looks like the images I’ve pasted here.
In the image below, I was at about 66.4% which is about perfect. (If the scale is all blue – keep boiling, you are below the minimum reading.)

In the picture below, I show 2 different batches. The one on the left is at the maximum (68.9%) and the one on the right is at the minimum (66%) brix values to technically be considered maple syrup.
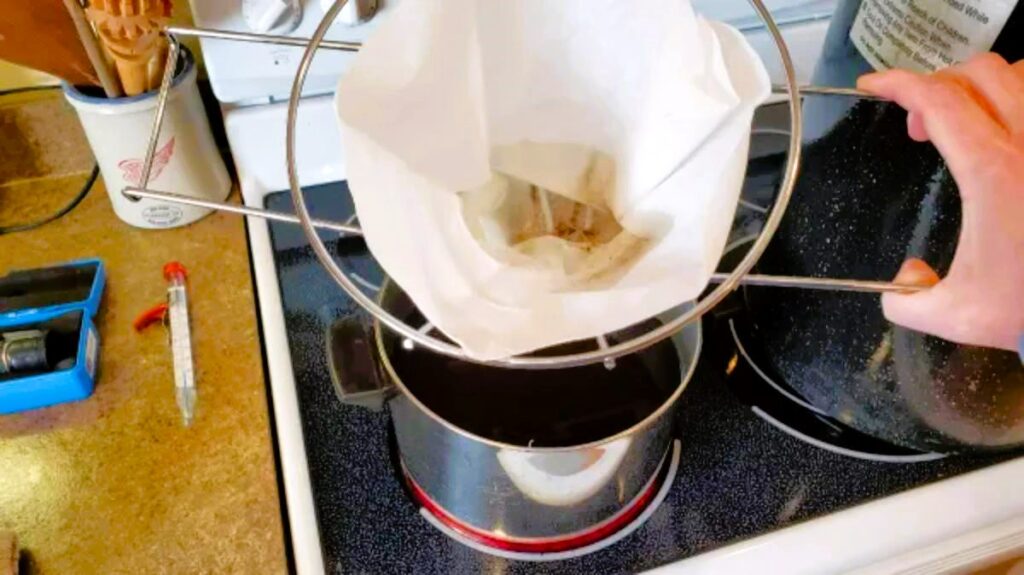
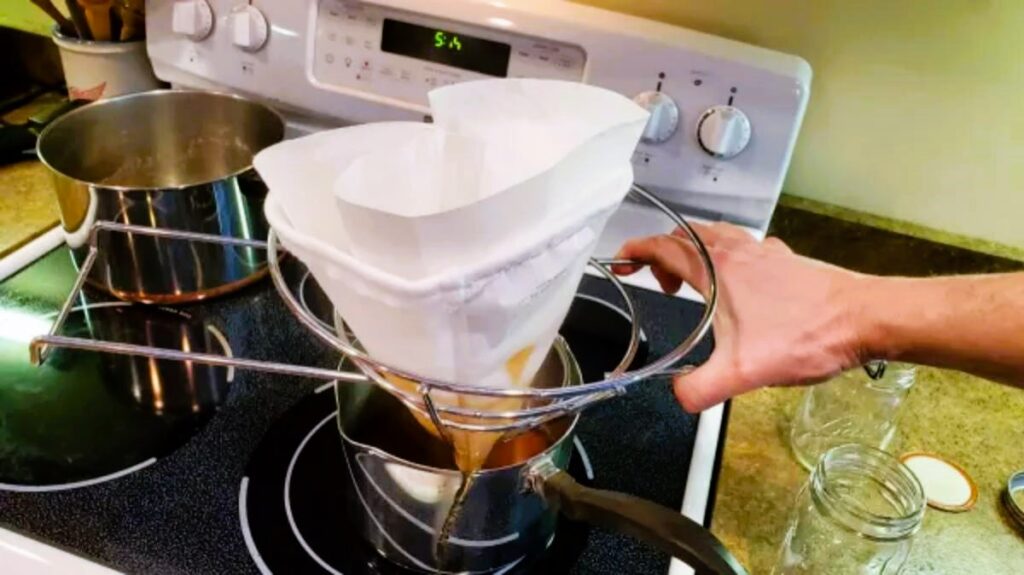
5 – Perform the Final Filtering
When the syrup is done boiling (around 219°F), you are now ready for the final filtering. This next step is very important, let the syrup cool slightly to around 180-190°F, then perform the final filtering.
This gives you time to get your synthetic filter and filter stand ready.
Note: If you filter at a higher temperature, sugar sand can still develop after the filtering! If that happens, your syrup will still look cloudy.
If you want to virtually eliminate all contaminants and sugar sand (niter) in your final product for a really nice, finished product, use a synthetic orlon filter for the final filtering.
The syrup in the picture below was filtered with a synthetic filter.
Check out my PODCAST episode on How to Achieve Crystal Clear Maple Syrup!

If you don’t care if there is some sugar sand in your syrup, go ahead and perform another mesh filter step and don’t worry about using a synthetic filter. Sugar sand is not harmful.
Sugar sand, or 'niter', is comprised of a potassium nitrate precipitate and is a normal byproduct of the maple syrup boiling process. It is perfectly safe to consume but can be a bit unsightly.
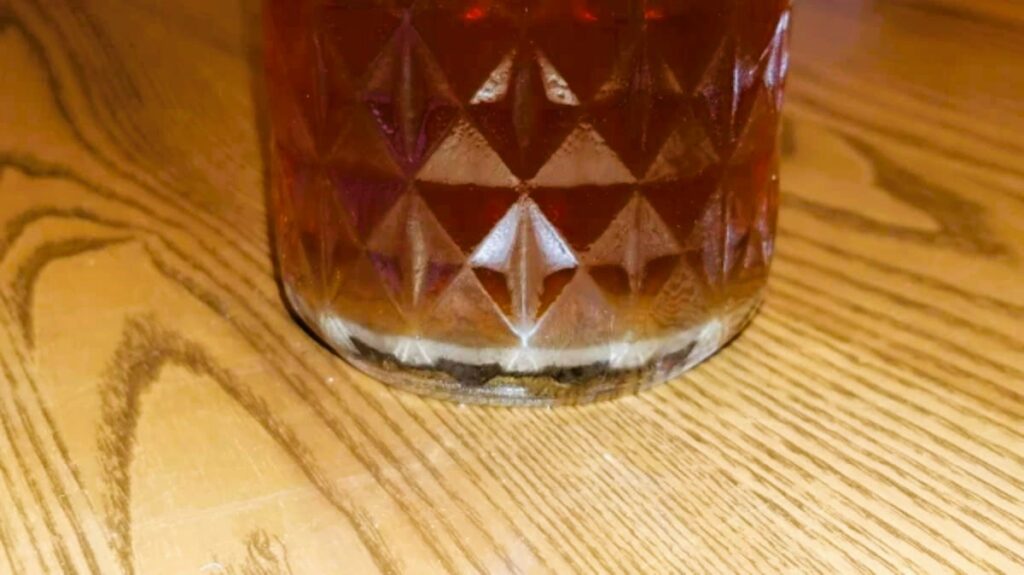
These pictures show maple syrup where only a mesh pre-filter has been used for filtering (3 times). Notice the sugar sand (niter) settled on the bottom of the jar.
It is perfectly safe to consume sugar sand. However, if you want that golden, honey-colored, transparent maple syrup, use a synthetic filter.
Synthetic filters are often made from a material called ‘Orlon’ which is a synthetic acrylic fiber first developed by DuPont. These have a filtering size of around 200 microns which effectively filters out the sugar sand.
Synthetic filters are normally used wet, meaning that they are soaked in hot water, then allowed to drip off before being used for filtering. If a synthetic filter is used dry, the filtering will not be as efficient, and will take much longer.
The use of a synthetic filter will remove almost all traces of sugar sand, leaving you with crystal clear, golden syrup!
Rinse the synthetic filter with hot water (don’t use soap) immediately after you are done, then let it drip-dry (don’t wring it out) and it will last for years. For larger batches, use a 3 qt synthetic filter.
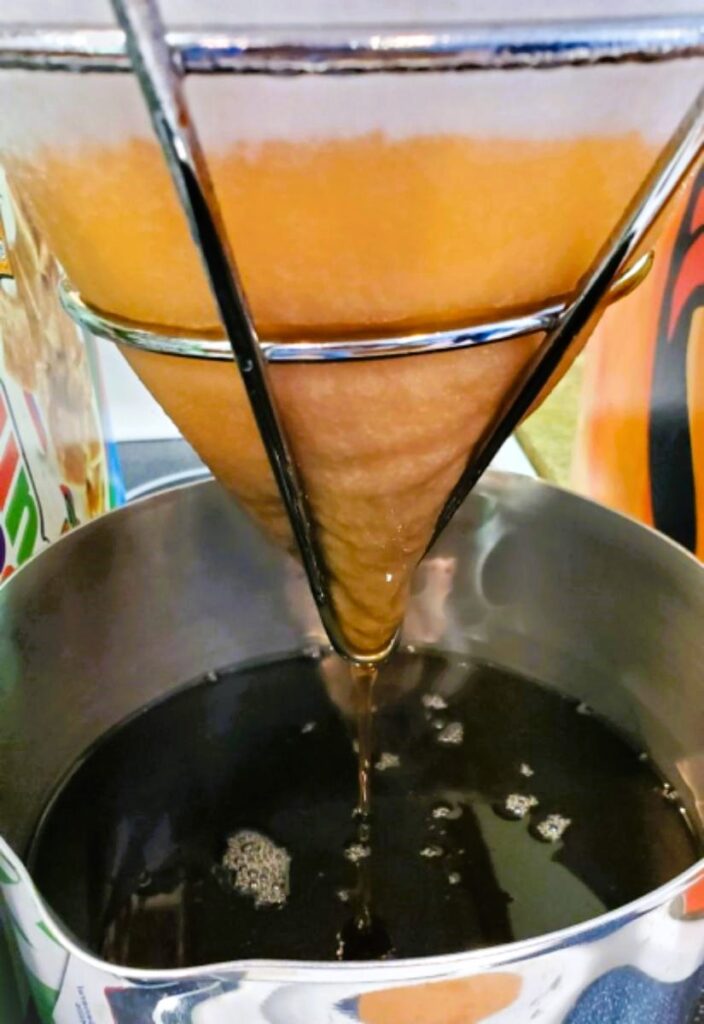
The following image shows syrup from the same batch that has been filtered with only a mesh pre-filter (left), and maple syrup that has been filtered with both a mesh filter and a synthetic filter (right).
Notice the lack of sugar sand at the bottom of the jar, as well as the overall increased clarity of the syrup itself for the synthetic-filtered syrup.

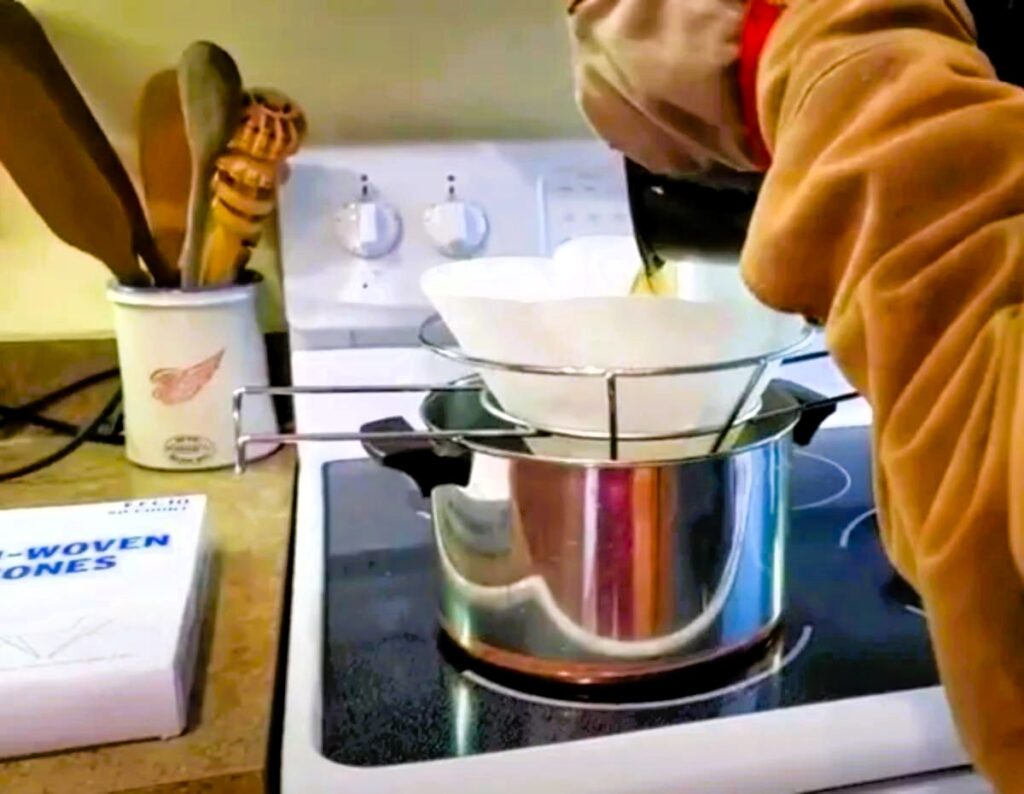
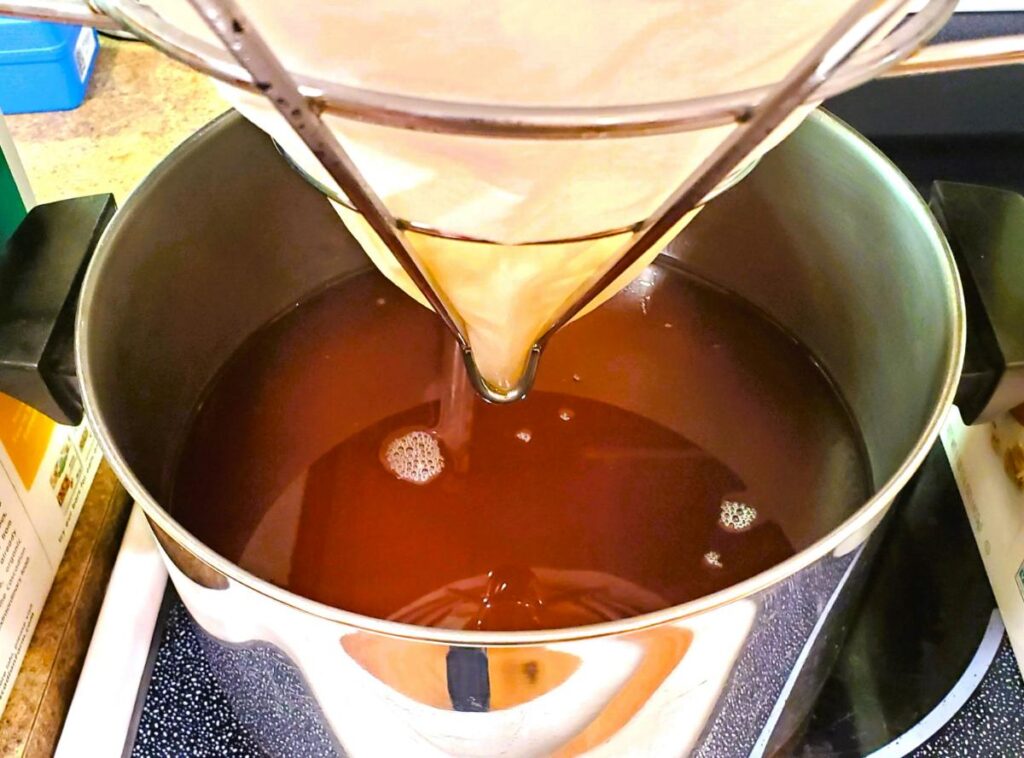
The final filtering process is done by putting one or more mesh pre-filters inside of the synthetic filter.
The pre-filter helps to catch any larger pieces of debris before the syrup goes through the synthetic filter, so that you don’t clog up the fine mesh of the synthetic filter.
Once the syrup has reached 180-190°F, carefully pour it through the two filters. If the syrup filter starts to clog, replace it with another one.
Nesting several filters together inside the synthetic filter is a convenient approach, since you can remove the inner one as it begins to clog up.
Here is a picture showing the final filtering process with a regular filter nested inside of the synthetic filter.
The syrup will pass through the synthetic filter relatively slowly. It helps to have the synthetic filter wet with hot water and allowed to drip dry before using it.
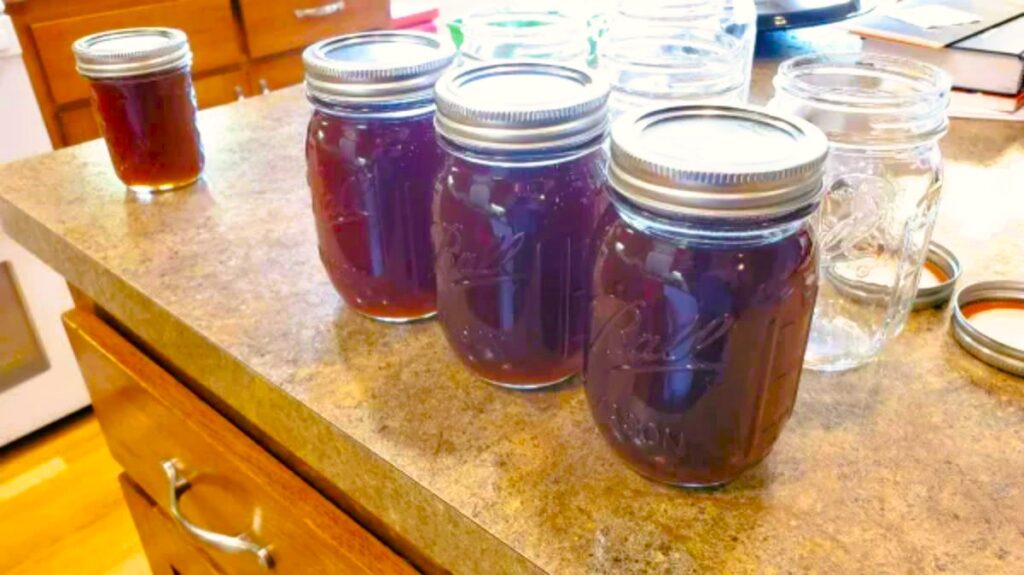
6 – As a Final Step, Can or Bottle the Finished syrup while it is still hot
Use a food-grade funnel to pour the syrup into clean canning jars or Maple Syrup Bottles (with ‘finger-hook’ handles) while it is still hot.
When you hear a ‘pop’, you know that they have sealed. Make sure your lids seal properly, if they don’t, your syrup can spoil! Some recommend using new lids every time you can, for this very reason.
Newsletter
Sign up for my newsletter in order to get helpful hints for Maple Syrup right to your inbox!
If you started out with 5 gallons of sap, you would end up with somewhere around 20 oz of pure maple syrup (32:1).
Of course, this depends on a number of factors related to the sugar content of the sap produced by your trees but can be used as a rule of thumb.
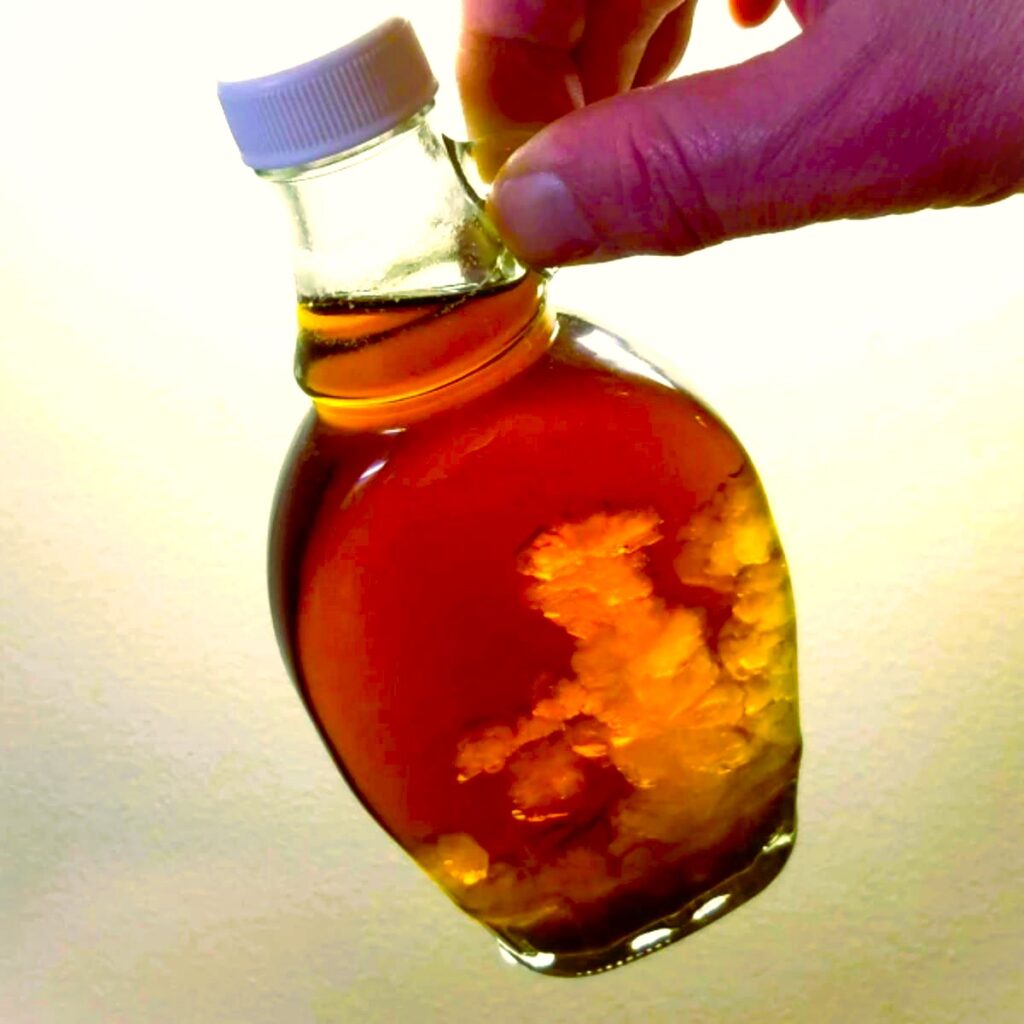
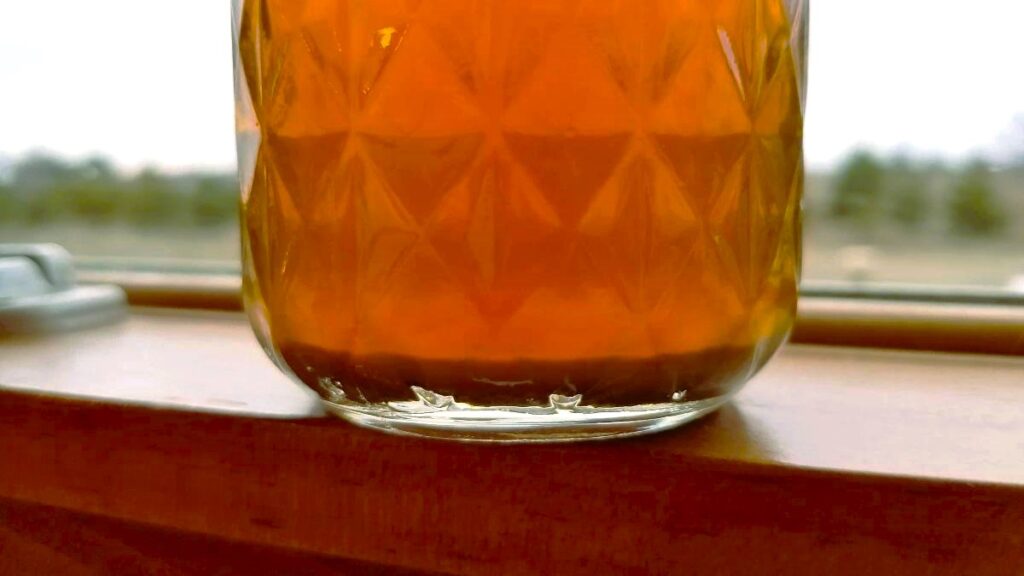
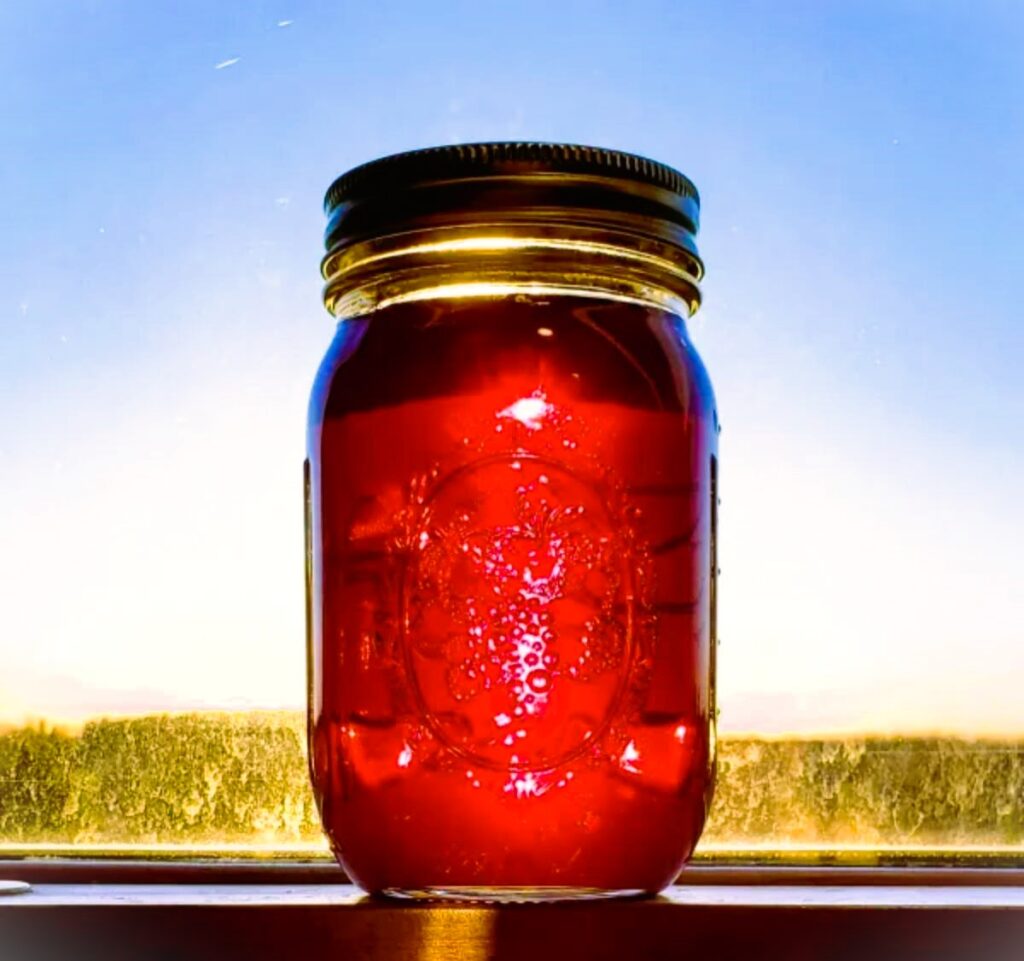
The final product is incredibly beautiful; it looks like a jewel.
Grades of Maple Syrup
As you may know, the color of the syrup that you produce will change over the course of the maple sugaring season, so don’t be surprised if your batches look different from one another!
Lighter syrup comes from the first sap that is harvested, and the color darkens as the season progresses. There is a maple syrup grading system established by the USDA to classify the grades of maple syrup.
Other factors that contribute to the color of your maple syrup include the type of maple trees you are tapping your maple sap from, and how long you boil it for.
In general, smaller batches that are boiled from start to finish without adding more sap as you go along, will be lighter in color.
Larger batches where sap is continually added to the evaporator (boiling vessel) will be darker in color due to the increased time allowed for the Maillard Reaction to take place.
I have had cases where I had to stop boiling mid-way through, so I put the syrup in the refrigerator overnight and continued boiling in the morning. That produced a very dark (and tasty) syrup!

Syrup can sit on the shelf indefinitely but should be refrigerated after opening the sealed jars.
I love fresh maple syrup so much, but it sure is sticky, so consider using a dripless syrup dispenser – clean and easy with no stickiness!
Congratulations! Enjoy your self-made maple syrup!
I hope you found this helpful! I know that harvesting maple sap and boiling it into fresh maple syrup is a highlight of the spring for my family! I hope it is for you and yours as well!
I love getting comments and especially hearing stories about how other people boil and make maple syrup! Please leave a comment on any tips and tricks that have worked well for you!
Tools and Supplies Used in This Article:
- large pot (5 quart)
- candy thermometer or digital thermometer
- canning jars and extra lids
- maple syrup bottles (with pinky-hook – very important)
- syrup filters (pack)
- synthetic filter for final filtering
- filter stand or strainer
- food-grade funnel
- refractometer or hydrometer
Note: Click here to download a 1-page PDF "Maple Syrup Making Cheat Sheet" that contains a summarized version of all the steps to making delicious Maple Syrup!
Play the “How to Make Maple Syrup Podcast!”
The “How to Make Maple Syrup Podcast!” is enjoyed by hundreds of listeners each week during the maple-sugaring season. We’d love for you to join us! We discuss our favorite tips and tricks for making maple syrup as well as interesting information related to the golden elixir!
https://anchor.fm/s/72969138/podcast/rssClick on the buttons below to listen on your favorite podcast player!


Or listen right from your browser:
How to Make Maple Syrup Podcast!
See these steps on YouTube!

Great site and information. Thanks so much. We are in Plymouth, MN. We put out 14 taps Feb. 1 and have processed 48 gallons so far.
Oh wow, that is excellent! The season definitely came early this year, thanks for the update!
Why is the finger hook so important on the glass bottles?
Good question! Sorry, that was supposed to be a joke! The finger hooks actually serve no purpose, they are a skeuomorph, meaning a no longer used feature that was kept for it’s stylistic aesthetic. In the olde times, larger jugs (holding several gallons) of this type had a similar loop to help carry and pour. This little feature stayed as a way to indicate real maple syrup, but doesn’t really serve a practical purpose anymore when the bottles are so tiny, they just look sort of cool! Thanks for the comment! I was wondering if anyone would pick up on that! You’re quite astute!
What temperature should be maintained while canning? Is there a magic number to maintain or stay below? I usually aim for 180 F.
Yeah, that should work great. Between 180 and 190 is what I recommend. Here is a good video relating to temperature of the syrup at canning:
https://youtu.be/SaA2byqDzNM
Thank you. Between your instructions and this video, I think I understand where I have gone wrong over the years. We have been doing this for 60 years and usually got very clear syrup, mostly by luck of how we did our filtering and keeping it hot. This explains where we’ve made errors. I appreciate your sharing of the details.